
No-Bake Graham Cracker Crust with Brown Sugar
Learn how to make your own homemade, buttery no-bake graham cracker crust with brown sugar in 10 minutes with only three ingredients! It’s so easy, flavorful, and fresh, you’ll never want to go back to store-bought!
This post may contain affiliate links. That means if you click on the link and make a purchase, I will receive an affiliate commission at no extra cost to you. All opinions remain my own. As an Amazon associate, I earn from qualifying purchases.
I think when the phrase “easy as pie” was invented, they must have been talking about graham cracker crusts. Because while traditional pie crust has a bit of a learning curve, there is nothing easier and more rewarding than making a homemade, buttery, graham crackery crust from scratch!
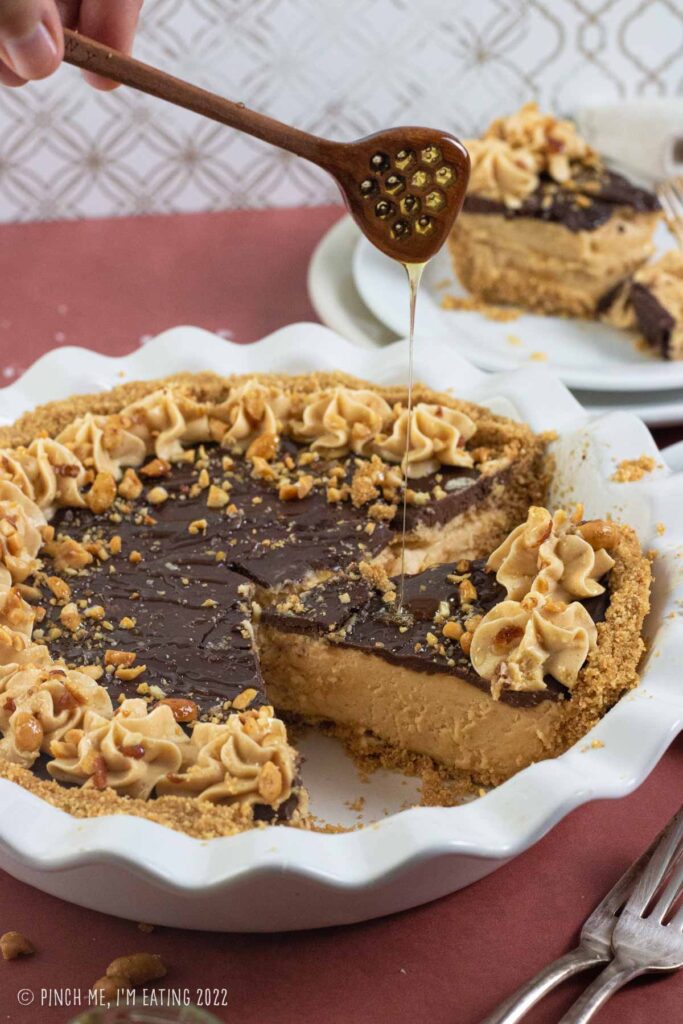
I love to use this crust for pies like my all-time favorite no-bake chocolate peanut butter pie with the fluffiest, creamiest peanut butter mousse and dark chocolate ganache. It’s also great for other cream pies and no-bake cheesecakes!
Ingredients
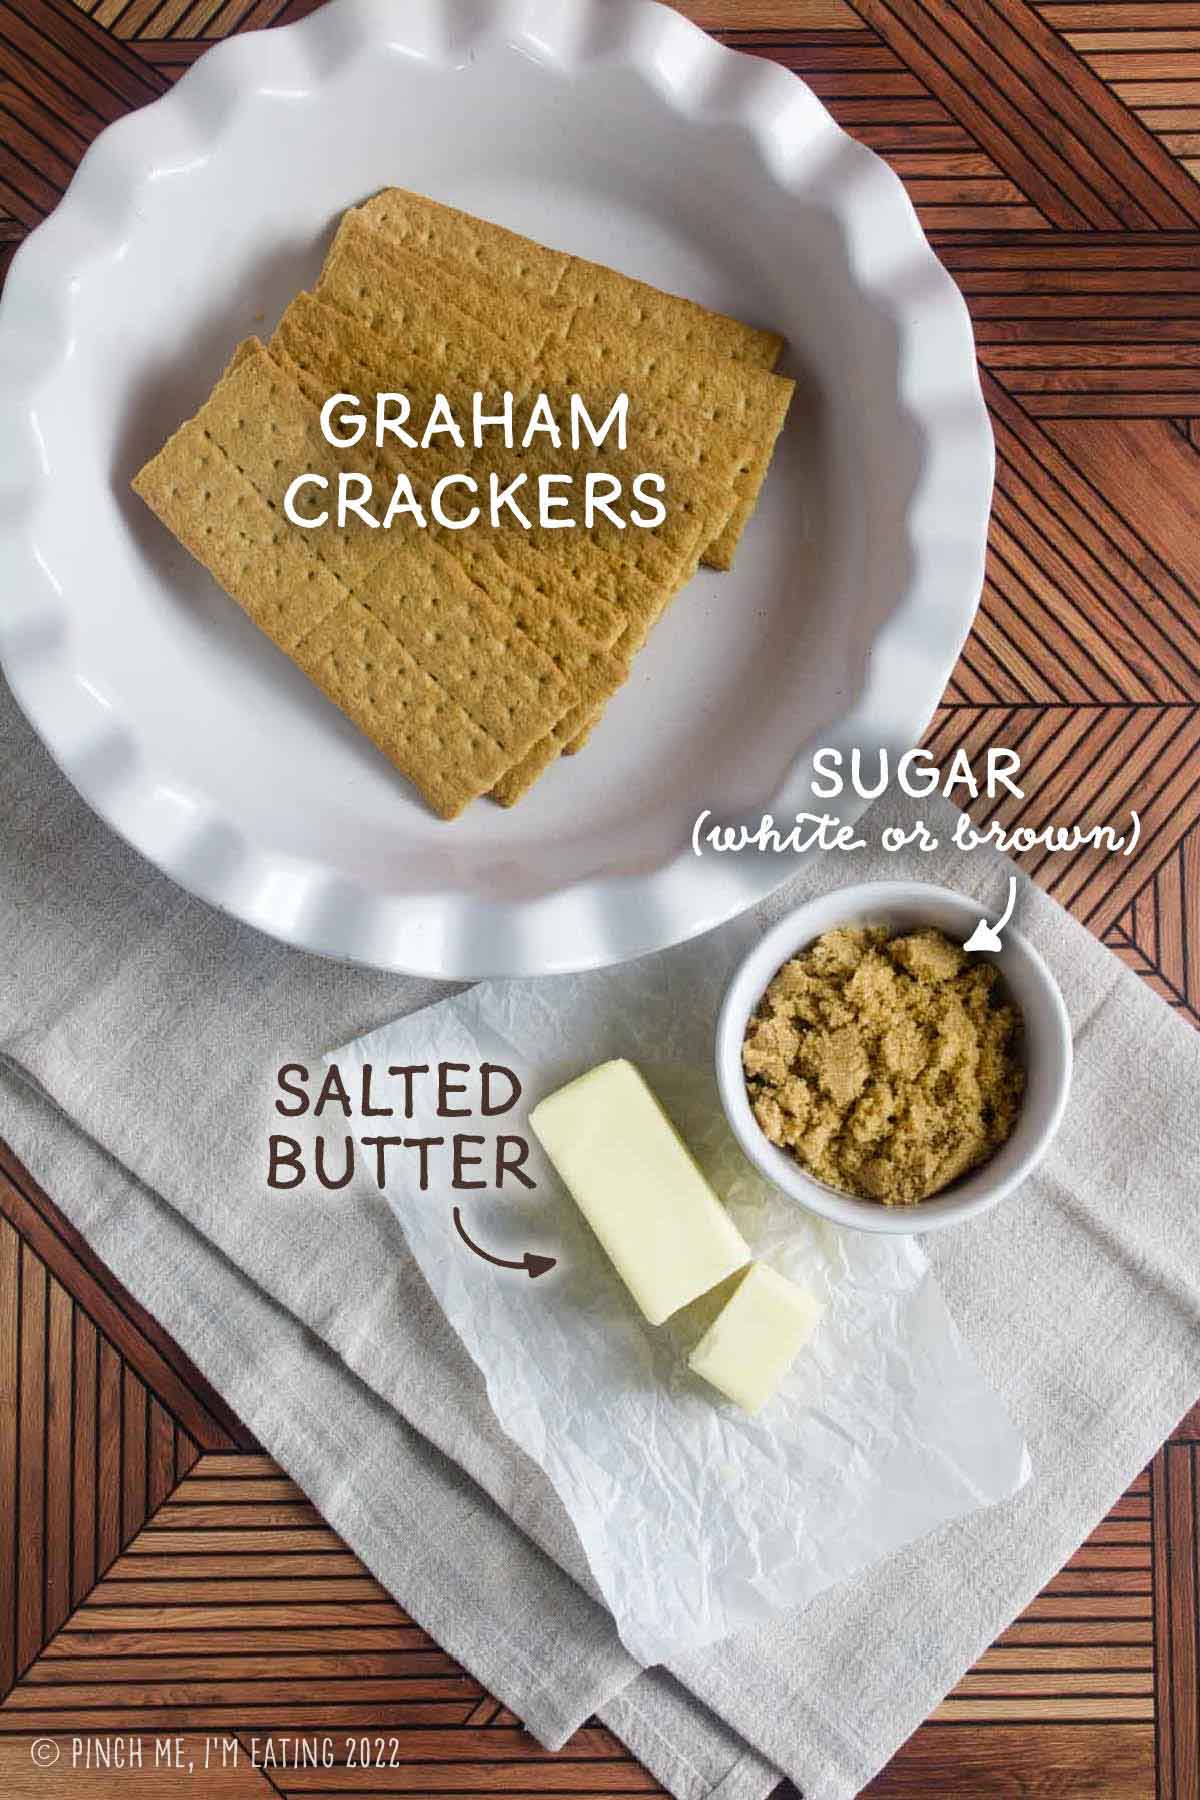
You only need THREE ingredients to make the best no-bake graham cracker crust ever! Best of all, you can keep all three ingredients on hand for any emergency pie-making needs that may arise.
How to Make a No-Bake Graham Cracker Crust
When I said this recipe was easy, I meant it! The three basic steps are crush, mix, and press.
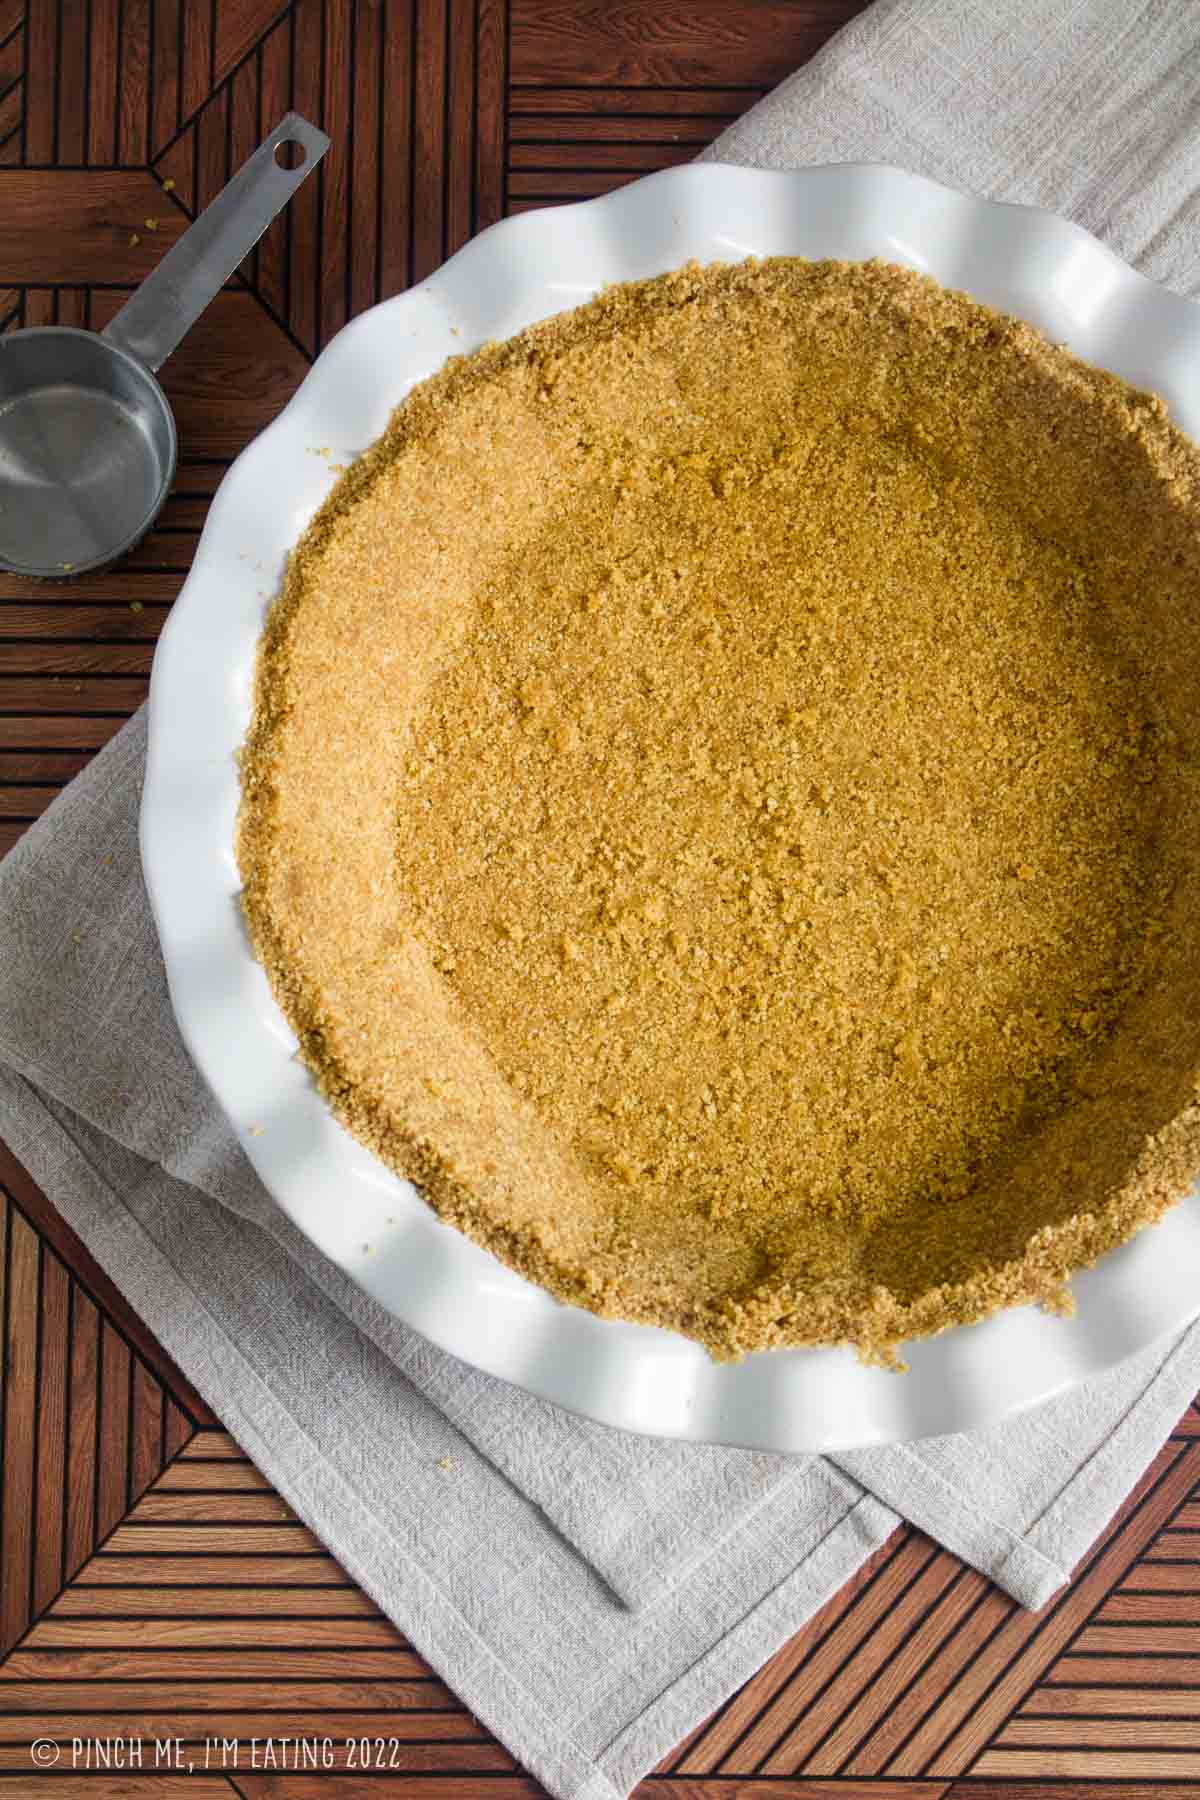
Crush: First, you’ll need to crush 10 full graham cracker sheets into fine, even crumbs. A food processor makes this very simple, but you can also use a gallon ziplock bag and a rolling pin instead. Just make sure there are no larger graham cracker chunks left, or your crust will not hold together as well.
You can also buy a box of pre-crushed graham cracker crumbs just for uses like this! In that case, use about one and a half cups of crumbs.

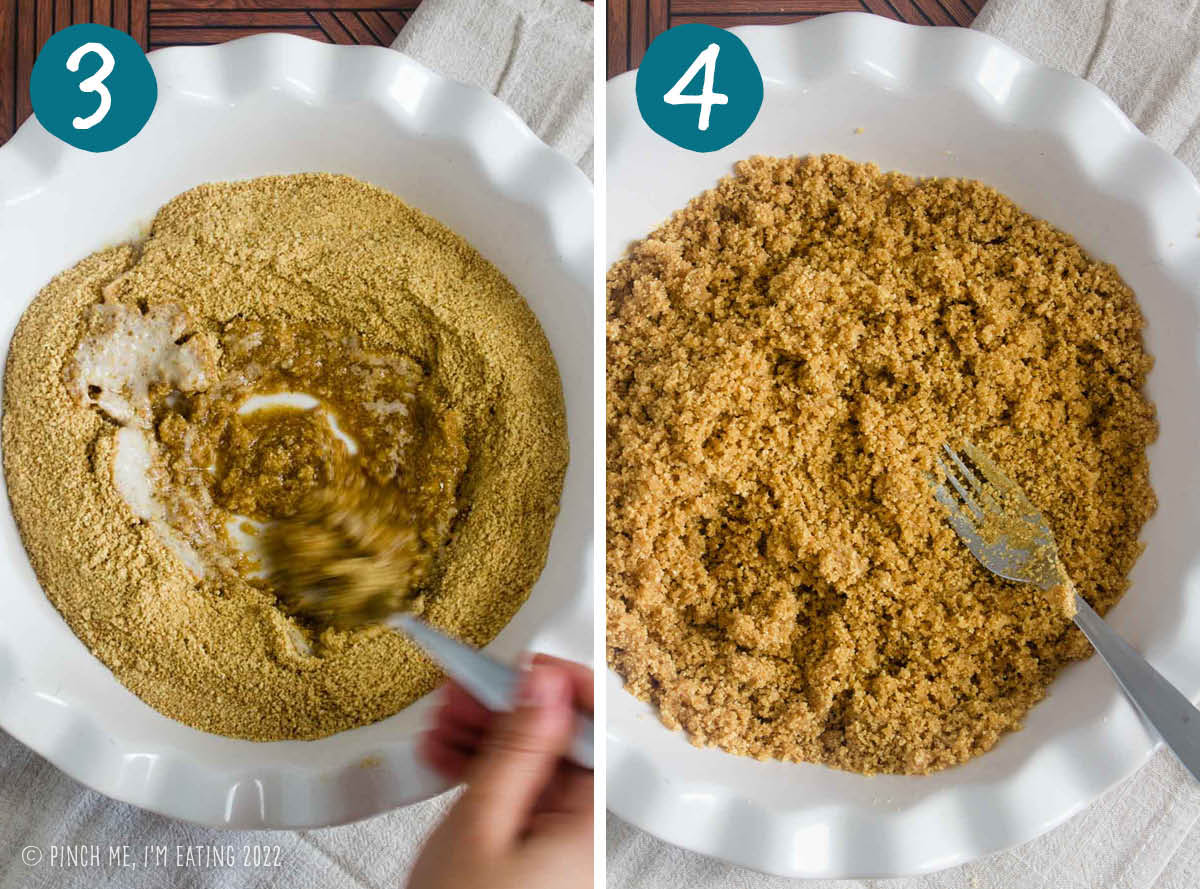
Mix: Next, combine the crumbs with sugar and melted butter. I do this straight in my pie plate to save on dishes. Just mix with a fork until everything is evenly combined and is a nice, crumbly, wet-sand texture.
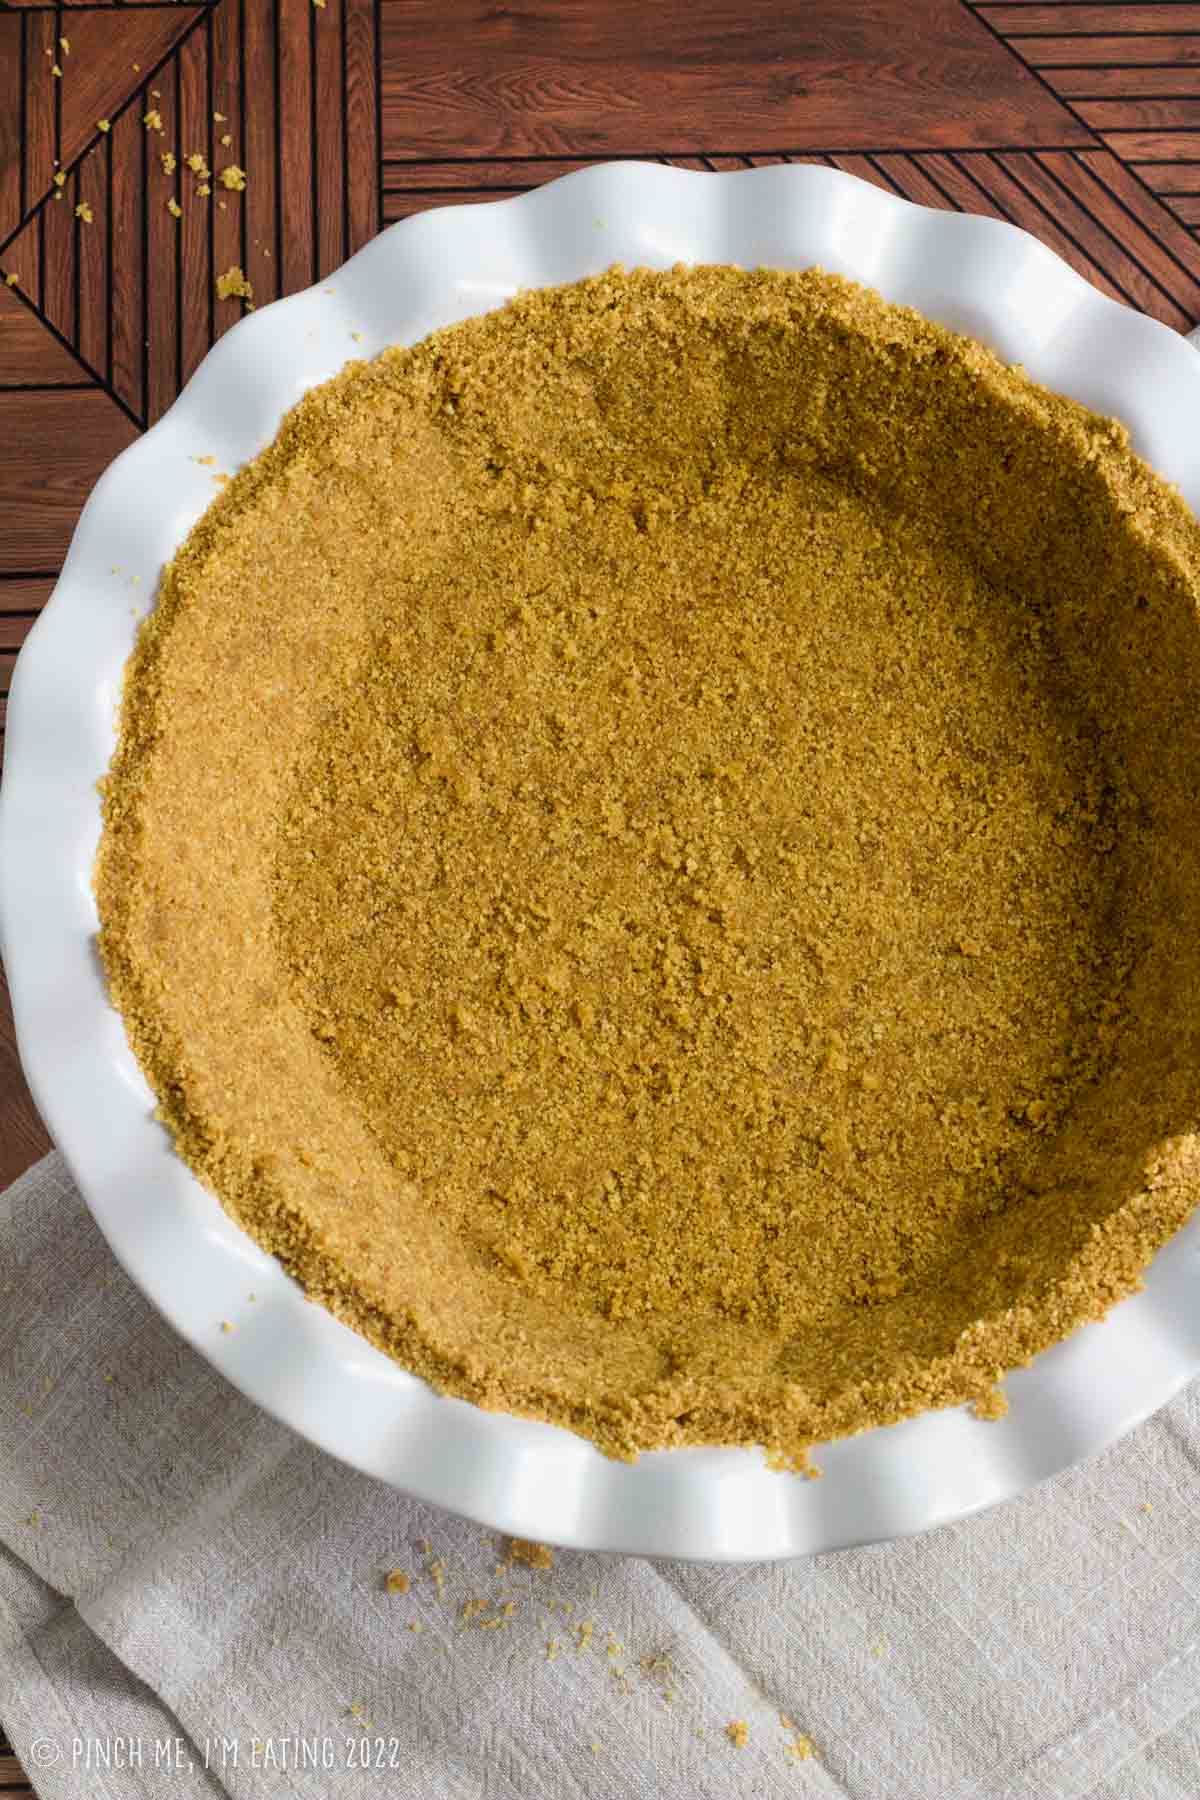
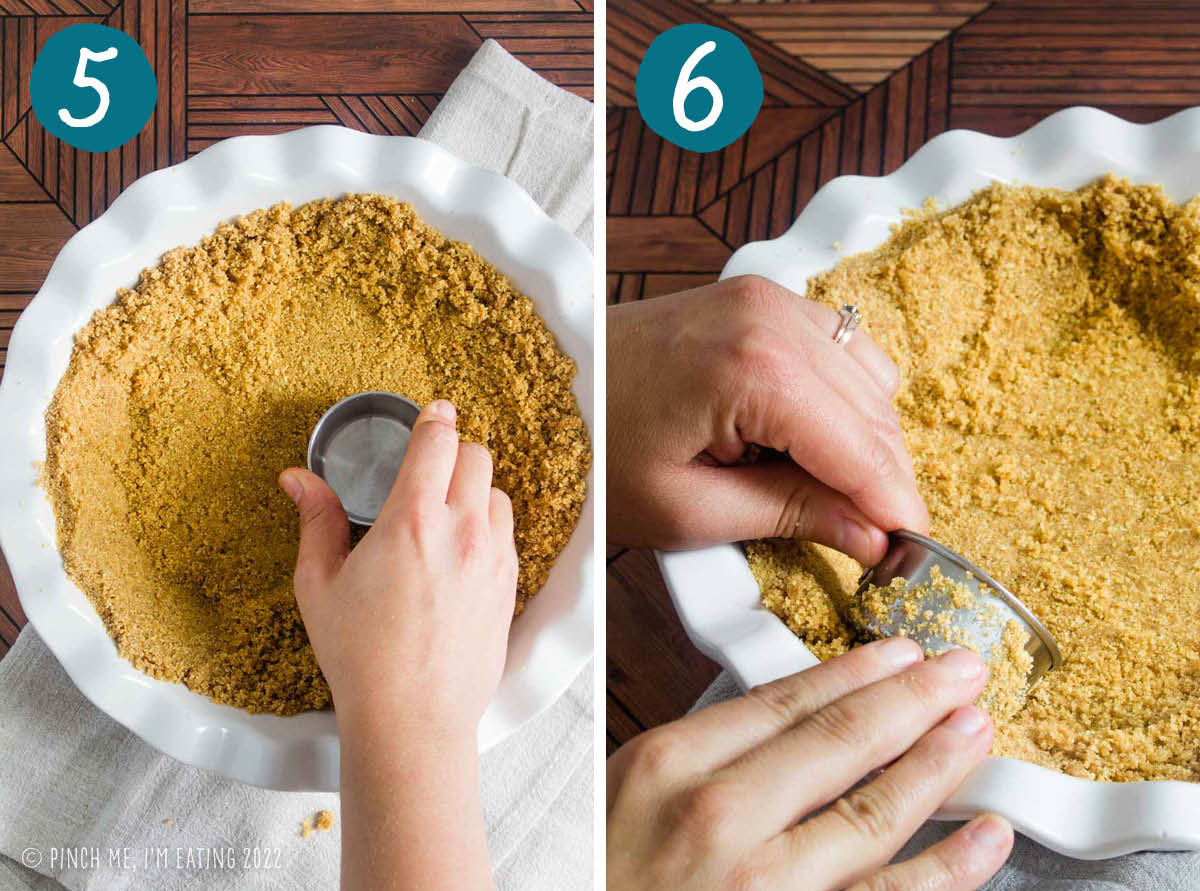
Press: Finally, you just spread out the mixture and pack everything down as hard as you can! A firm, compact crust is key to it holding together, so I like to use the back of a small measuring cup to really pack it down.
When compacting the edges, I press the measuring cup against the side with my fingers on the top to make an even top edge.
A little time in the fridge is all it needs for the butter to solidify and everything to bind together. After that, it’s ready to use for your favorite no-bake pie!
Baked Graham Cracker Crust
While this recipe is for a no-bake crust, you can absolutely bake it if you’d like. This will make it a bit crunchier, more solid, and less crumbly. You can pre-bake at 350 degrees for 7-10 minutes, being careful not to overbrown.
Or, if you’re making a pie that needs to be baked, just pop it in the oven with the filling already added.
How to Use a No-Bake Graham Cracker Crust
A no-bake crust is perfect for a no-bake pie, or for pie filling that is cooked before adding to the crust.
You can use this easy graham cracker crust recipe:
- for no-bake cheesecake
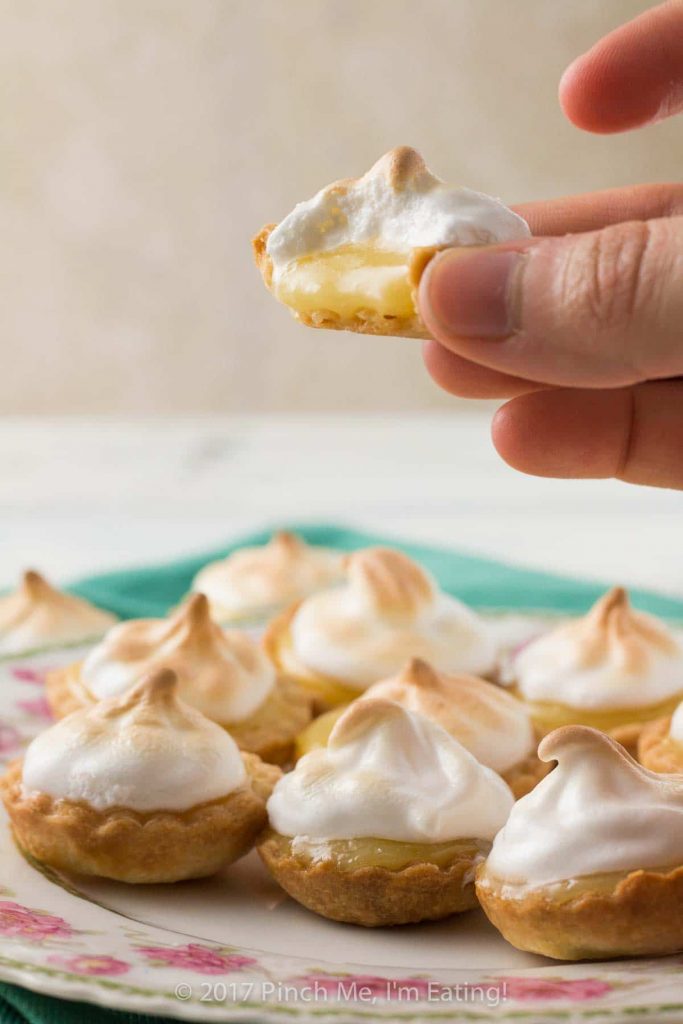
- for lemon meringue pie
- for banana cream pie
- for key lime pie
- for ice cream cake
- or for my absolute favorite no-bake peanut butter pie.
Expert Tips & Tricks
- The key to a solid no-bake graham cracker crust is fine, even crumbs and a compact crust. So be sure to use firm, even pressure when compacting your crust!
- For a crunchier, less crumbly crust, you can bake it at 350 degrees for 7-10 minutes.
- You can add spices like nutmeg or cinnamon to complement your pie filling!
More Recipes You’ll Love
Be sure to FOLLOW ME on FACEBOOK, PINTEREST, INSTAGRAM, and TWITTER for more great recipe ideas! Or SIGN UP for my EMAIL NEWSLETTER to get updates and recipes straight to your inbox!

No-Bake Graham Cracker Crust with Brown Sugar
Ingredients
- 10 graham crackers or 1 1/2 cups graham cracker crumbs
- 1/4 cup brown sugar granulated sugar may be used if you'd like
- 6 tablespoons salted butter melted
Instructions
- Add graham crackers to the bowl of a food processor and pulverize until you have fine, even crumbs. You may also put graham crackers into a gallon ziplock bag and crush with a rolling pin, just make sure the crumbs are fine and you don't have any larger cracker chunks. If using premade graham cracker crumbs, you can skip this step.
- Transfer graham cracker crumbs to your pie plate (ceramic or metal works better here than disposable so you can press firmly against the sides) and add brown sugar and melted butter.
- Stir with a fork until you have a consistent, crumbly, wet-sand texture.
- Press mixture firmly and evenly around the bottom and sides of the pie dish with the back of a measuring cup. Compact your crust as much as possible! When going around the sides, I use my fingers to make an even top edge while pressing the crumbs against the side of the pie plate with the measuring cup.
- Chill for 15 minutes before using to solidify the butter and firm up the crust.

