Homemade Earl Grey Marshmallows with honey
Homemade Earl Grey marshmallows combine Earl Grey’s iconic black tea and bergamot flavor with a touch of honey to make the perfect sweet treat for tea lovers!
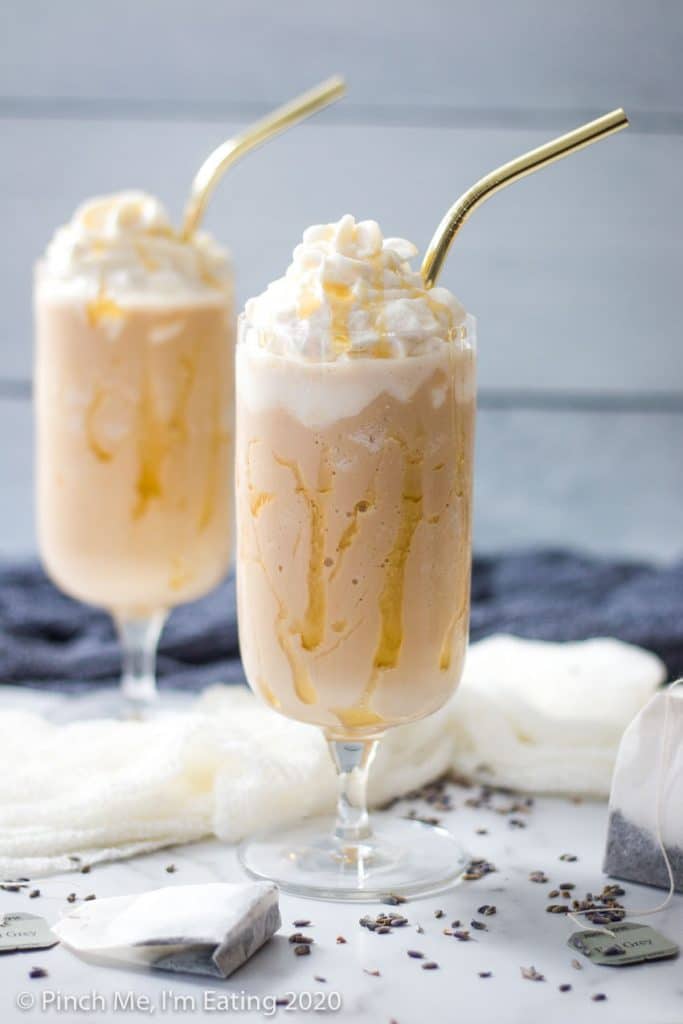
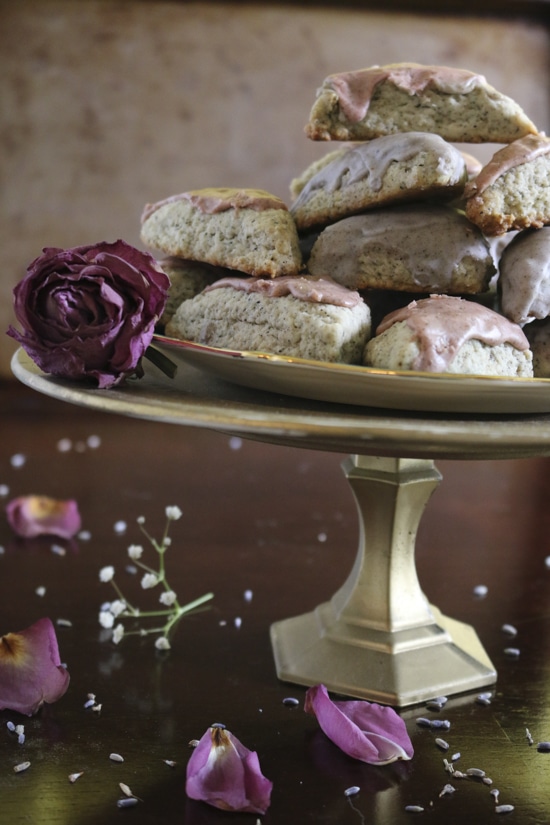
So if you’ve been keeping up with the blog, you know that I’m obsessed with Earl Grey tea — making London Fog tea lattes, Lavender Earl Grey frappuccinos, and even Earl Grey scones — and have recently been enamored with the process of making homemade marshmallows.
You can guess where this is going, and you’d be right. I made Earl Grey flavored marshmallows and they were everything I dreamed they would be.
They’re the perfect little sweet treat to have on hand and make the most amazing s’mores I’ve ever had.
If you haven’t made homemade marshmallows before, the basic process is this. You boil sugar until it reaches 240 degrees, or “soft ball” stage in candy making terms. Then you whip it with gelatin until it’s fluffy and let it set in a pan.
The 240 degrees is what makes it taste like a marshmallow (plus, usually, some good vanilla), and the gelatin is what gives it the squishy marshmallow texture we all know and love.
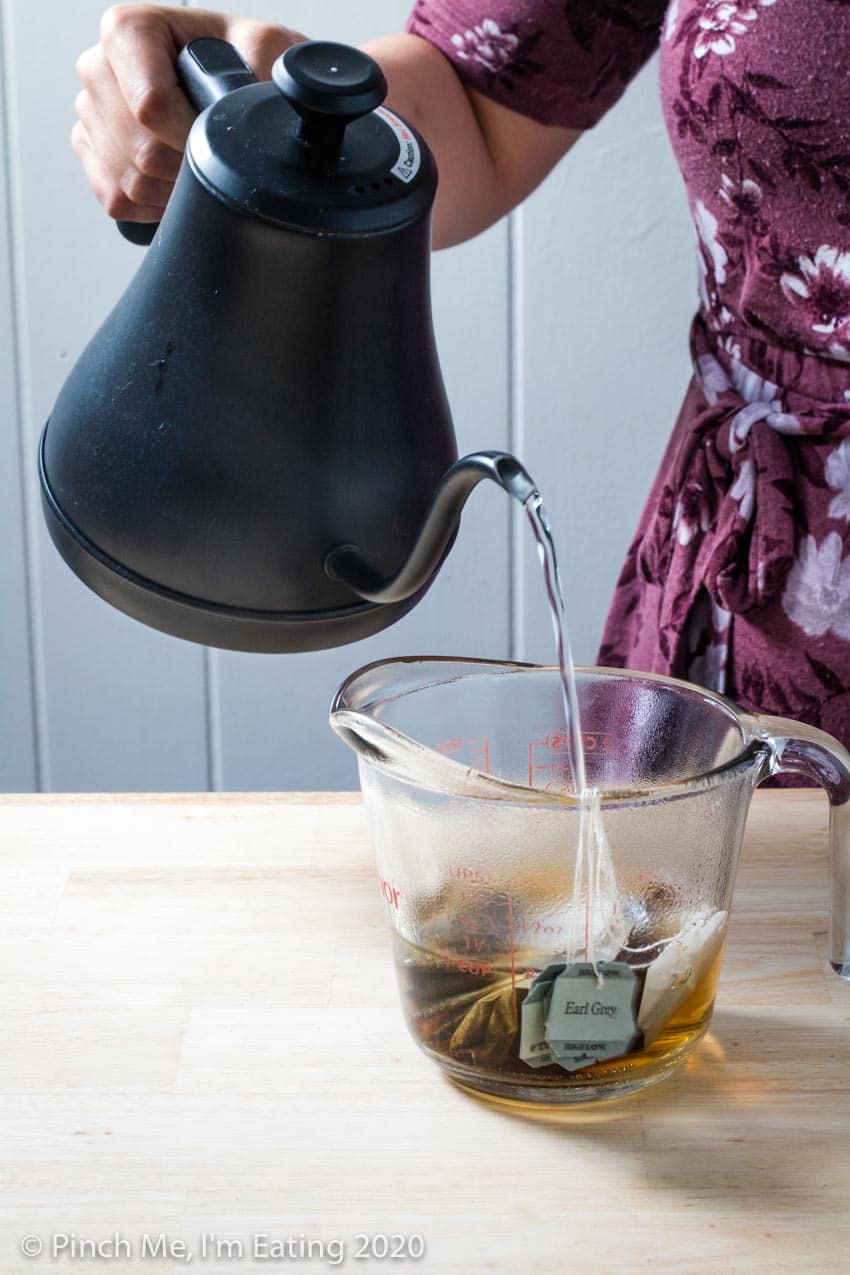
A standard marshmallow recipe uses a cup of water (half a cup for blooming the gelatin and another half a cup to boil with the sugar), so making Earl Grey marshmallows is as simple as swapping out the water for strongly-brewed tea. And by strongly-brewed, I mean I used four tea bags for one cup of water. That flavor has to permeate the whole batch of marshmallows, not just the one cup of tea.
Homemade marshmallow essentials
Here are a couple of things to keep in mind when you’re making homemade Earl Grey marshmallows.
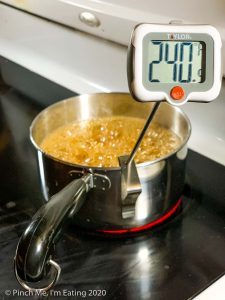
- Use a candy thermometer. Marshmallow making involves boiling sugar and whipping it with gelatin. Make sure your sugar reaches the required 240 degrees (in candy making terms, “soft ball stage”) or they won’t taste right and they’ll be soggy. You can test it by dropping some hot sugar in a glass of cold water and see if it starts to ball up (versus being stringy) but really I would say you need a digital candy thermometer.
- Watch your sugar. Do not turn your back on it when it’s boiling, especially since this recipe contains honey. Otherwise it will boil over all over your stove. Honey does something to the sugar mixture that makes it bubble up like crazy for a minute. Keep an eye on it especially between about 220 and 225 degrees: I find this is when it is most likely to boil over before it settles into a steady boil.
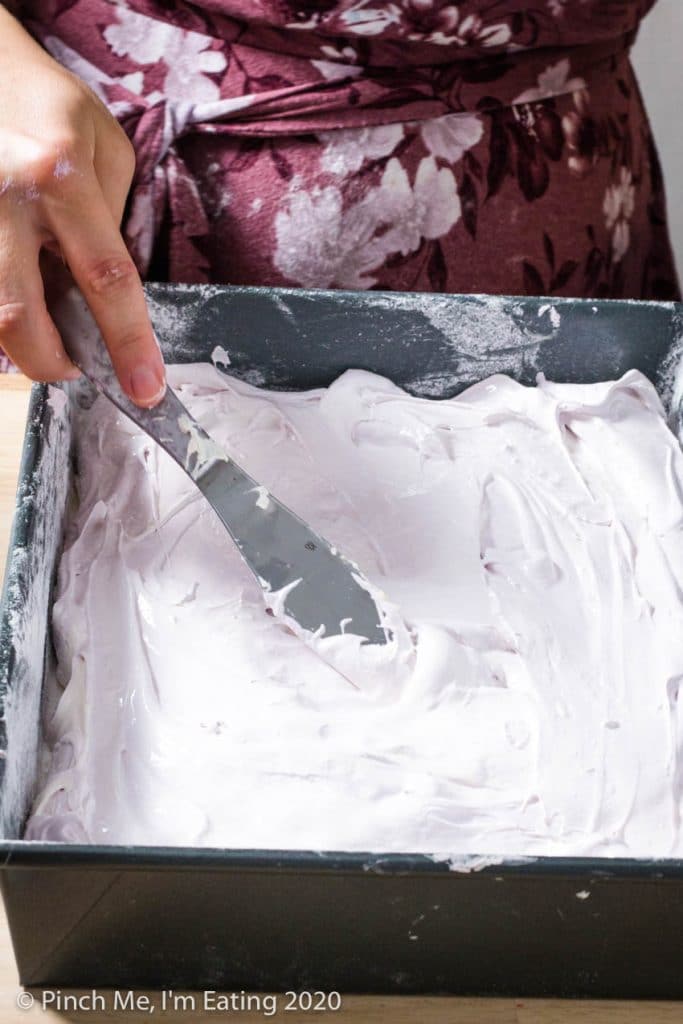
- Work quickly. Once you turn off your mixer, the marshmallow mixture will start to set very quickly, so it’s vital that you have your pan prepared in advance. You need to scrape it out of your mixing bowl as fast as you can so you can smooth out the top before it starts getting really difficult. This is especially true if you’re planning to add food coloring to half for a swirl effect. Have all your measuring spoons and food coloring and bowls and spatulas right there, ready to go!
To read more details about the process and science of making marshmallows, check out my post on how to make homemade marshmallows.
Using honey in homemade marshmallows
Since Earl Grey pairs so wonderfully with honey, I also wanted to add a touch of honey to the recipe without overwhelming the flavor of the tea. So I initially traded a quarter cup of the corn syrup for honey.
Honey and marshmallow texture
The thing about honey is that it’s hydrophilic, meaning it attracts water and pulls moisture from the air. So the marshmallows were a slightly more moist consistency than the vanilla marshmallows I had made.
Let me clarify what I mean by moist.
During an earlier failed attempt to make vanilla marshmallows, I hadn’t heated the sugar up to the required 240 degrees — it only reached 230 before I decided that’s as high as it would go. After whipping it, I poured the mixture in my prepared powdered-sugar-and-cornstarch-coated pan, dusted the top with more powdered sugar mixture and let it set. It absorbed all the powdered sugar mix, so I dusted more on top. It absorbed that too. No matter how much I added it just kept getting sucked into the marshmallow, which, by the way, tasted like “diet” marshmallows according to my husband. They were legit SOGGY and unappealing.
When I say the marshmallows with honey are a bit more moist, that is not what I’m talking about. These just had a bit more of a moist texture to them that’s not at all unpleasant, but is slightly different from the consistency of my vanilla marshmallows. (sorry if the word moist makes your skin crawl, but I couldn’t think of a better word!)
With some taste-testing help from my friend Jenn, owner and chef at my favorite tea room, Twenty Six Divine, I decided to go the happy medium route of using only two tablespoons of honey instead of a full quarter cup. That gives a touch of the honey flavor I was looking for without compromising the texture quite as much. If you try it and don’t like it, you can drop the honey altogether and go back to using a full cup of corn syrup.
Honey flavor
Since we aren’t using quite as much honey as in my initial test, I’d recommend using a more strongly-flavored honey if you have one available to you. My favorite strong honeys are the sourwood or tupelo honeys from Savannah Bee Company. Seriously, if you have only tried grocery-store honey before, you have GOT to give some of their honeys a try.
If you don’t have a Savannah Bee Company near you, you can order their honeys from Amazon! (you don’t have to make a million batches of marshmallows to use it though, I also love drizzling it on fresh figs and using it on these blueberry and ricotta crostinis)
This list contains affiliate links. If you make a purchase using a link on my site, I may earn a commission.
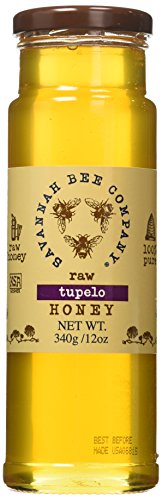
Savannah Bee Company Tupelo Honey
I love the strong flavor of Tupelo honey. Two tablespoons would go a long way in this recipe!
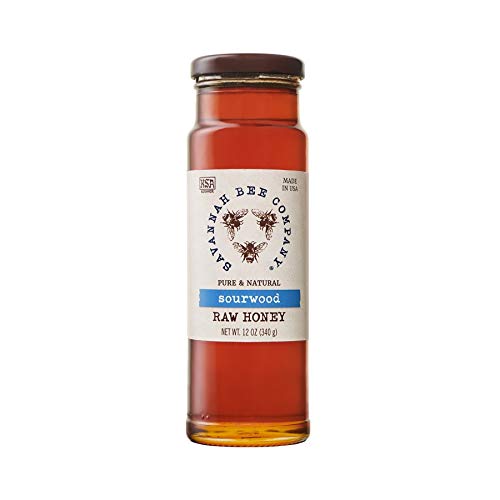
Savannah Bee Company Sourwood Honey
This is my other favorite strong honey from Savannah Bee company. You won't regret having one of these!
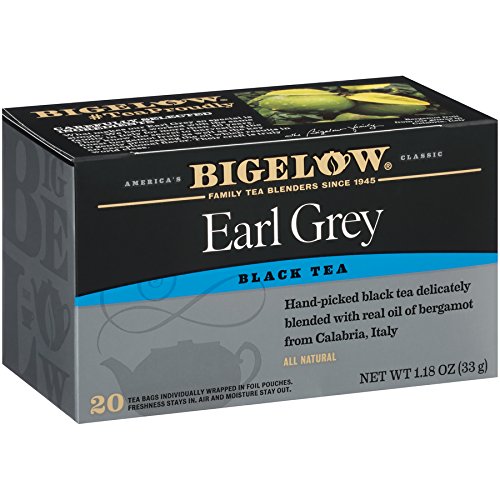
Bigelow Earl Grey Black Tea Bags
This is the brand of Earl Grey I drink every day and use in these marshmallows!
I made this recipe twice using only two tablespoons of honey: once with grocery store honey and once with some Black Sage honey from Savannah Bee company I had on hand. And let me tell you, the honey you use makes a huge difference in the final flavor! Don’t skimp on using good honey!
Boiling honey for your marshmallows
One other thing about using honey in these Earl Grey marshmallows. Do not, I repeat, DO NOT turn your back on the boiling sugar mixture, especially when you’re using honey. Especially once it hits 225 degrees Fahrenheit.
Honey makes boiling sugar act differently. I found that even just a little honey makes it boil up so much higher than just corn syrup, sugar, and water, and if you’re using a small saucepan it will be very difficult to keep it from boiling over. While I use a small (1 quart) saucepan to make regular vanilla marshmallows, since these have honey in them, I use a saucepan at least 1.5 quarts for this recipe.
Earl Grey Marshmallow S’mores
I really can’t decide which I like better now, traditional homemade vanilla marshmallows or Earl Grey marshmallows.
But I’ll tell you what is like mind-blowingly amazing: S’mores made with traditional honey graham crackers, Earl Grey marshmallows, and extra-dark 72% Ghirardelli chocolate. HOLY COW. I mean it’s so good I may never eat regular s’mores again. (Who am I kidding, I’d never turn down a s’more in any form!)
And don’t think you have to build a campfire to enjoy one of these bad boys. Just split a graham cracker in half, top one side with a square of chocolate and the other with a marshmallow, and stick it under your broiler for a minute. Take out the half with the chocolate not long after it starts looking glossy (otherwise the chocolate will get an unpleasant burnt texture) and put the half with the marshmallow back in until it gets nice and toasty brown on top.
This is the messiest s’more I’ve ever eaten, but ohhhhhh so worth it.
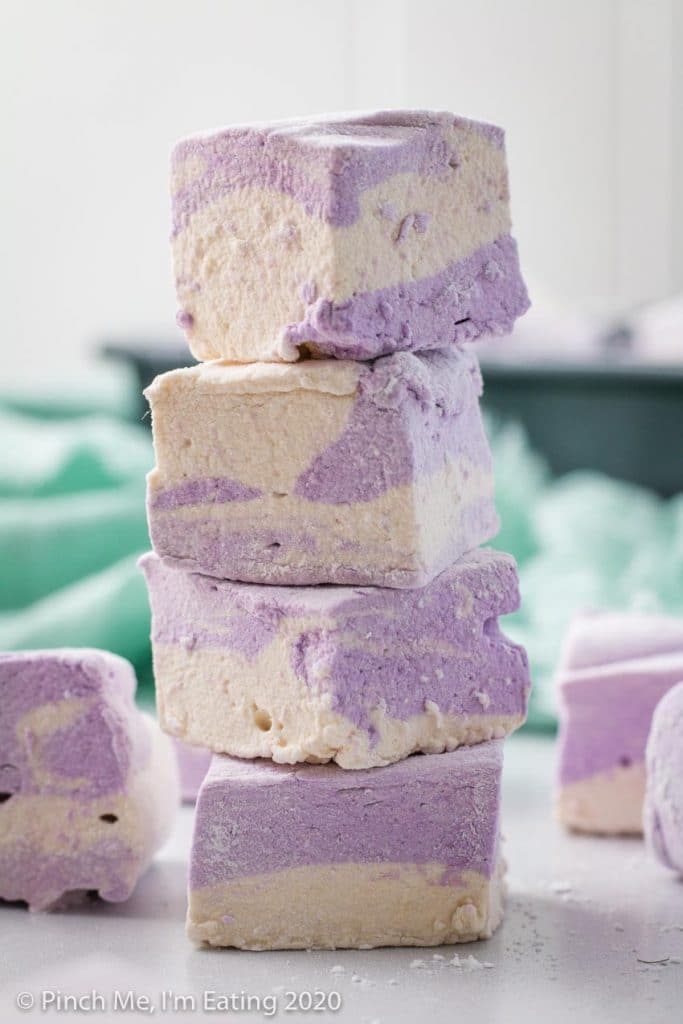
Adding color to homemade marshmallows
Whether or not you add color to your Earl Grey marshmallows is totally up to you. I’m not typically a huge proponent of unnecessary food coloring, but I do kind of like a colored marshmallow. Plus, if you’re making multiple types of marshmallows, a little color can help you identify which ones are what flavors.
The time to add food coloring is immediately after you add the vanilla, while the marshmallow is still whipping. You have a couple options.
- For a solid color: Add food coloring right after the vanilla and let it fully incorporate. Start with 1/2 or 1 tsp food coloring and continue adding additional drops until you reach your desired color. (I needed significantly more food coloring to get a decent color in mind – 2 tsp food coloring to color half the mixture)
- For a swirled color: You can add food coloring right after the vanilla and let it partially incorporate before turning off your mixer.
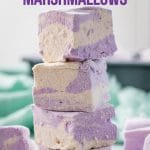
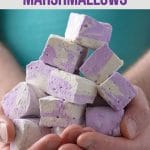
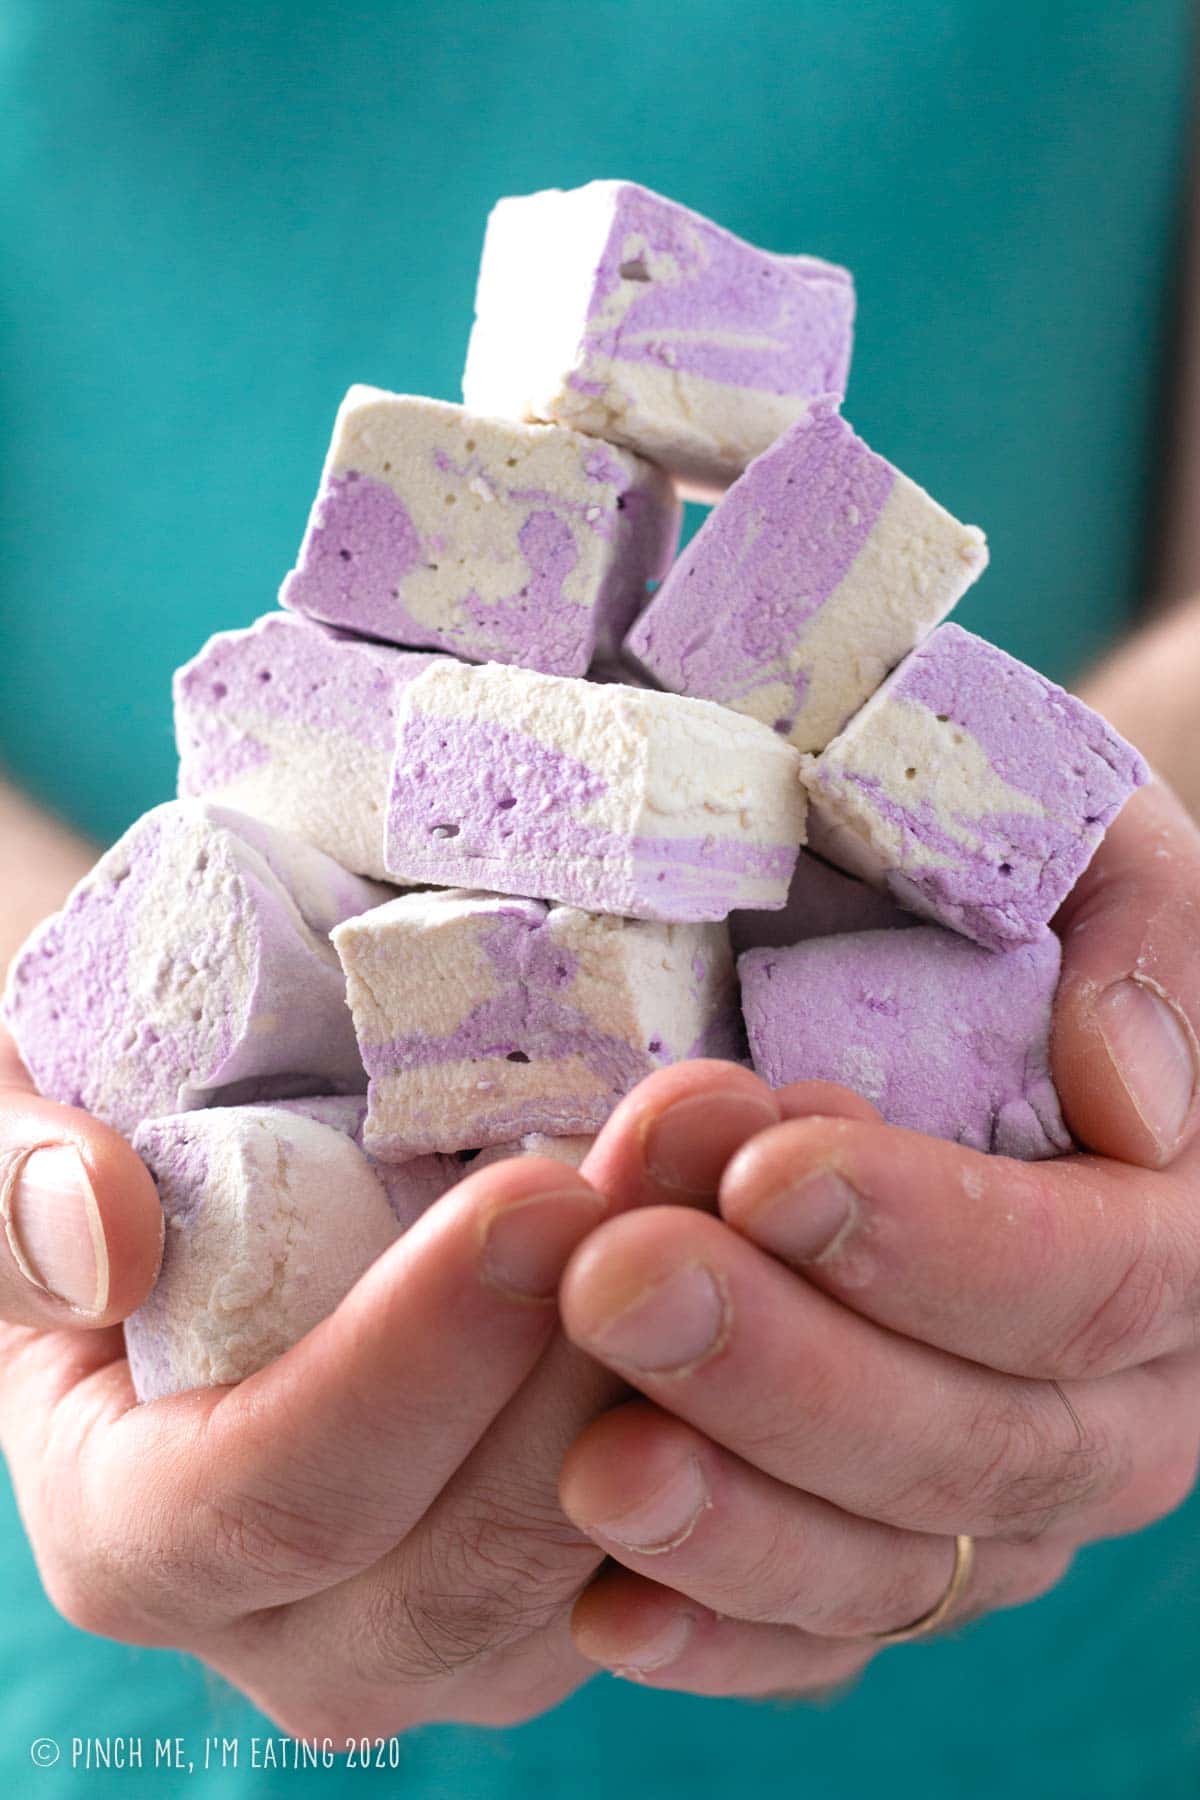
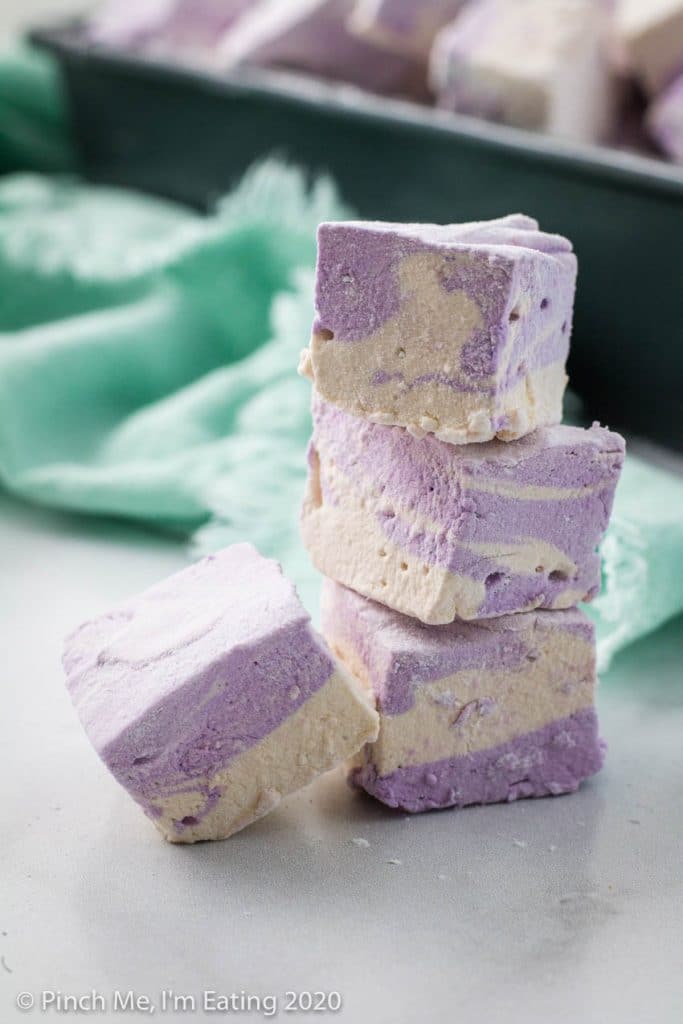
- Alternately, for a swirled color: Set aside half or 2/3 of the warm, uncolored marshmallow mixture (don’t stress about the exact amount, you don’t have time for that!), and add food coloring to the remaining marshmallow, beating until fully incorporated. Then spoon splotches of colored and uncolored marshmallow into your pan and swirl gently with a knife. You have to work quickly this way because the marshmallow starts to set pretty fast! This is what I did and I had to add a full 2 tsp of purple food coloring to get a noticeable enough color to the remaining half of the marshmallow mixture. It may have taken more to color these Earl Grey marshmallows than it would regular vanilla marshmallows because the tea gives it a darker base color you have to account for.
I’ve made three batches of these in the last few weeks and I’m just trying to refrain from eating them so I have enough to send baggies of them to all my sisters and my mom. It’s hard, I tell you! I just want to pop a couple of these babies in my mouth every time I pass through the kitchen.
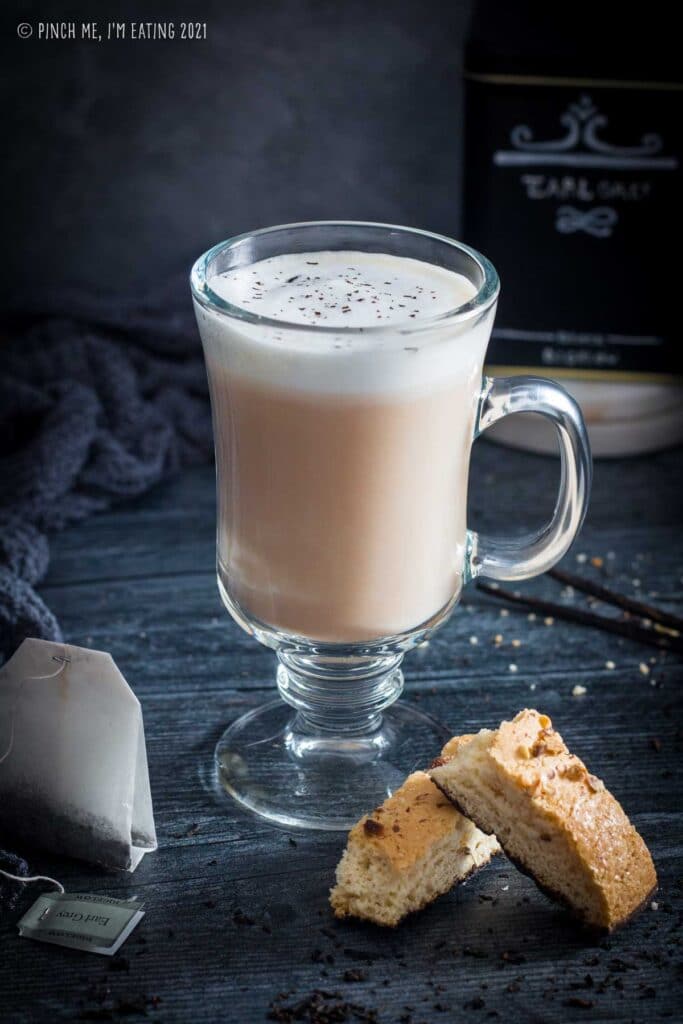
Or can you imagine one of these melting into a rich, creamy homemade hot chocolate or London Fog latte? You bet these will be a staple sweet in my house!
Go ahead, give them a try. They’re much easier than you’d think! I hope you enjoy these as much as I have!
More Earl Grey recipes
If you love Earl Grey tea as much as I do, check out some of these other recipes!

Earl Grey Marshmallows with Honey
Ingredients
- 4 bags Earl Grey tea
- 3 packets unflavored gelatin
- 1 1/2 cups granulated sugar
- 3/4 cup plus 2 tbsp light corn syrup
- 2 tbsp honey preferably strongly flavored, like tupelo or sourwood
- 1/4 tsp salt
- 1 tbsp vanilla extract good quality
- nonstick cooking spray
- 1/2 cup powdered sugar
- 1/3 cup cornstarch
- 2 tsp food coloring optional
Instructions
- Pour 1 cup boiling water (or 1 1/4 cups, for good measure) over tea bags. Let steep for 10 minutes, then refrigerate until cold.

- In the bowl of a stand mixer fitted with a whisk attachment, sprinkle gelatin over 1/2 cup chilled tea and let it sit for about 10 minutes to bloom.
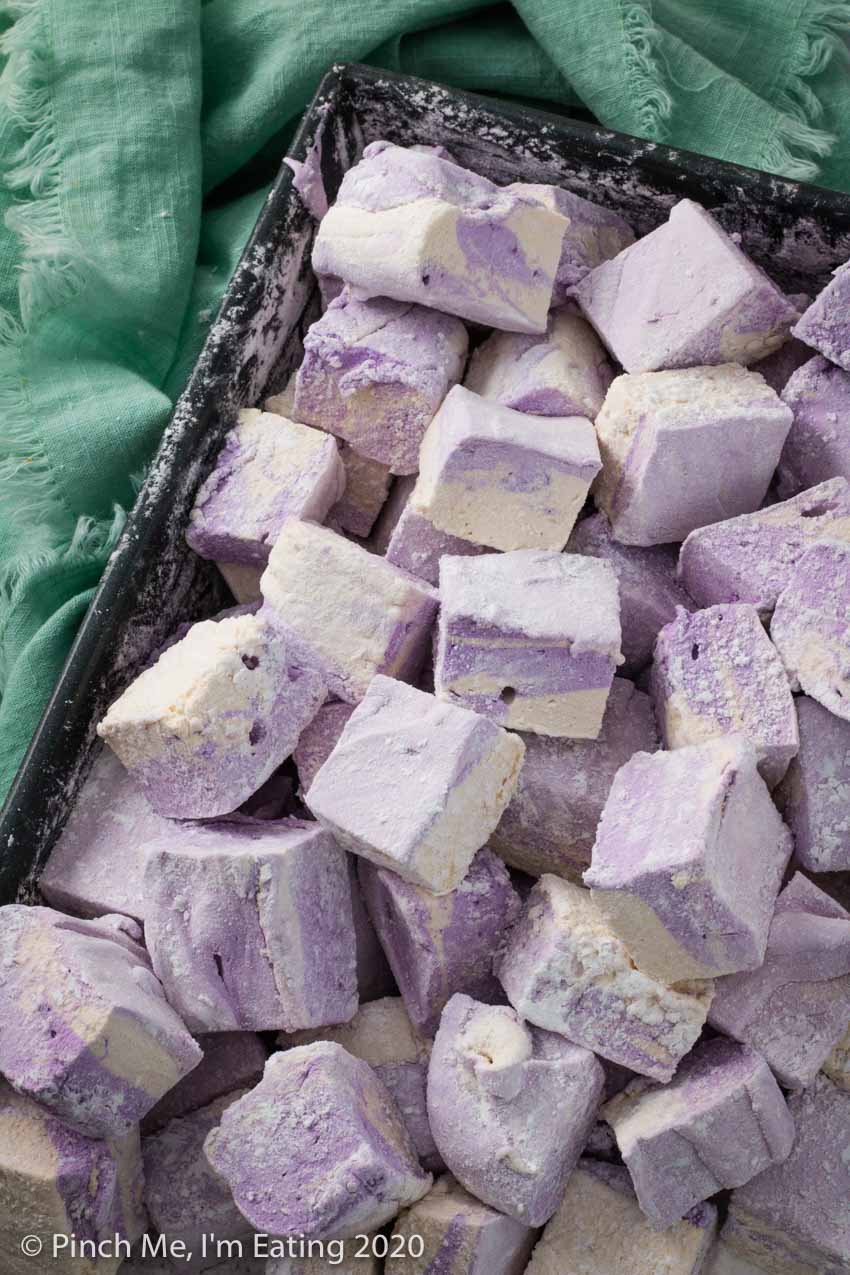
- Mix together powdered sugar and cornstarch. Prepare a 9×13 or 9×9 inch pan by spraying with nonstick cooking spray and then dusting with half the powdered sugar mixture. Use a 9×9 pan for thicker marshmallows and a 9×13 pan for flatter, smaller marshmallows. (The ones pictured used a 9×13 pan.) Marshmallows are super sticky so make sure the pan is well coated!
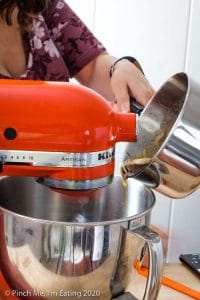
- In a medium saucepan, mix granulated sugar, corn syrup, honey, 1/2 cup tea, and salt. Bring to a boil over medium high heat and measure with a candy thermometer until it reaches 240 degrees. Do not turn your back on the sugar as it starts getting hot! It boils over very easily if you're not watching! It's most likely to boil over between about 220 and 225 degrees, so watch very closely as it approaches these temperatures. The added honey makes it go especially crazy!

- With mixer on low speed, slowly drizzle in the hot syrup mixture. Gradually increase the speed to medium high and whip the mixture for 11-14 minutes, until mixture is lukewarm, and thick and fluffy like meringue. Add vanilla extract and mix just until incorporated, no more than a minute.

For uncolored marshmallows
- Spray a rubber spatula with cooking spray and use it to quickly scrape the marshmallow into the prepared pan. The marshmallow sets pretty quickly so you will need to smooth out the top immediately!
For single-colored marshmallows
- Add the vanilla around the 11 minute mark, followed by food coloring. Add food coloring as needed until it reaches the desired color. I've read to start with 1/2 tsp food coloring but in my experience that wasn't nearly enough. I used 2 tsp food coloring for half the mixture, so don't be shy with your food coloring when you start adding it. I think since the tea makes a darker base color you have to compensate for with the food coloring, so it requires more.
- Spray a rubber spatula with cooking spray and use it to quickly scrape the marshmallow into the prepared pan. The marshmallow sets pretty quickly so you will need to smooth out the top immediately!
For swirled marshmallows (pictured)
- Add the vanilla around the 11 minute mark, let it incorporate for 30 seconds to a minute, and then turn off the mixer. Spray a rubber spatula with cooking spray. Working quickly, scoop about half or 2/3 of the marshmallow mixture into a separate bowl (don't be exact, you don't have time for that!). Add food coloring to the remaining mixture and continue beating for about a minute until fully incorporated. I used about 2 tsp purple food coloring to color half my mixture so the contrast between the light and purple was more noticeable.
- Scoop large dollops of uncolored and colored marshmallow into your prepared pan so that the colored ones touch the uncolored ones. Swirl by running a knife through the marshmallow in s-shapes long-ways and short-ways through the pan. Smooth it out on top as best you can — I found using a spatula in each hand was helpful for this.
For all marshmallows
- Lightly dust the top with more powdered sugar mixture and let sit at room temperature for at least 4 hours, and up to overnight, to set. Save any remaining powdered sugar mixture.
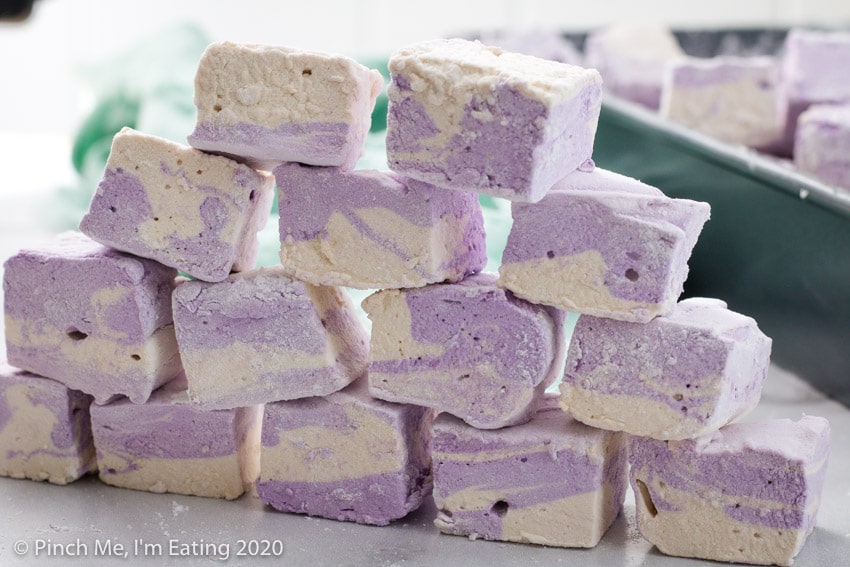
- Flip out the marshmallow slab onto a large cutting board and use a large oiled knife or pizza cutter to cut the marshmallows into 1 1/2-inch squares. You can also use an oiled cookie cutter for fun-shaped marshmallows!
- Once cut, toss the marshmallows a few at a time in powdered sugar/cornstarch mix to keep them from sticking.
- Store in an airtight container at room temperature for up to 3-4 weeks.