
Almond Coconut Bonbons (beginner friendly)
Homemade almond coconut bonbons are a rich, decadent, and easy gourmet dessert perfect for gifts, parties and showers, or date night desserts! A simple filling with easily-available ingredients is portioned, chilled, and then dipped in chocolate melting wafers for an impressive yet beginner-friendly bonbon recipe: no tempering chocolate required!
This post was originally published in 2016 and updated in 2026 for length and clarity. The recipe has also been updated for better flavor.
My family loves to stop in the French chocolate shop downtown and look at all the bonbons — literal eye candy behind the glass. They’re as pretty to look at as they are delicious to eat, and the number of fillings and flavors available is impressive.
They’re also $2.50 a piece, so they’re definitely an occasional treat, and we might get one bonbon each.
Making your own bonbons might seem unattainable — I mean, they’re so pretty and professional, right? But you actually can make your own, and — spoiler — it is actually SUPER EASY. You don’t have to buy any special tools either (although you can, if you want to buy a silicone candy mold and make fancy shapes: see the tips and tricks section).
These almond coconut bonbons are a perfect beginner bonbon recipe, with a simple filling made mostly from butter, powdered sugar, nut butter, and coconut. After mixing the filling (either in a bowl or a mini food processor for a smoother texture), you portion out little balls, firm them up in the refrigerator, and dip them in chocolate melting wafers. If you happen to be comfortable tempering chocolate, you can do that instead.
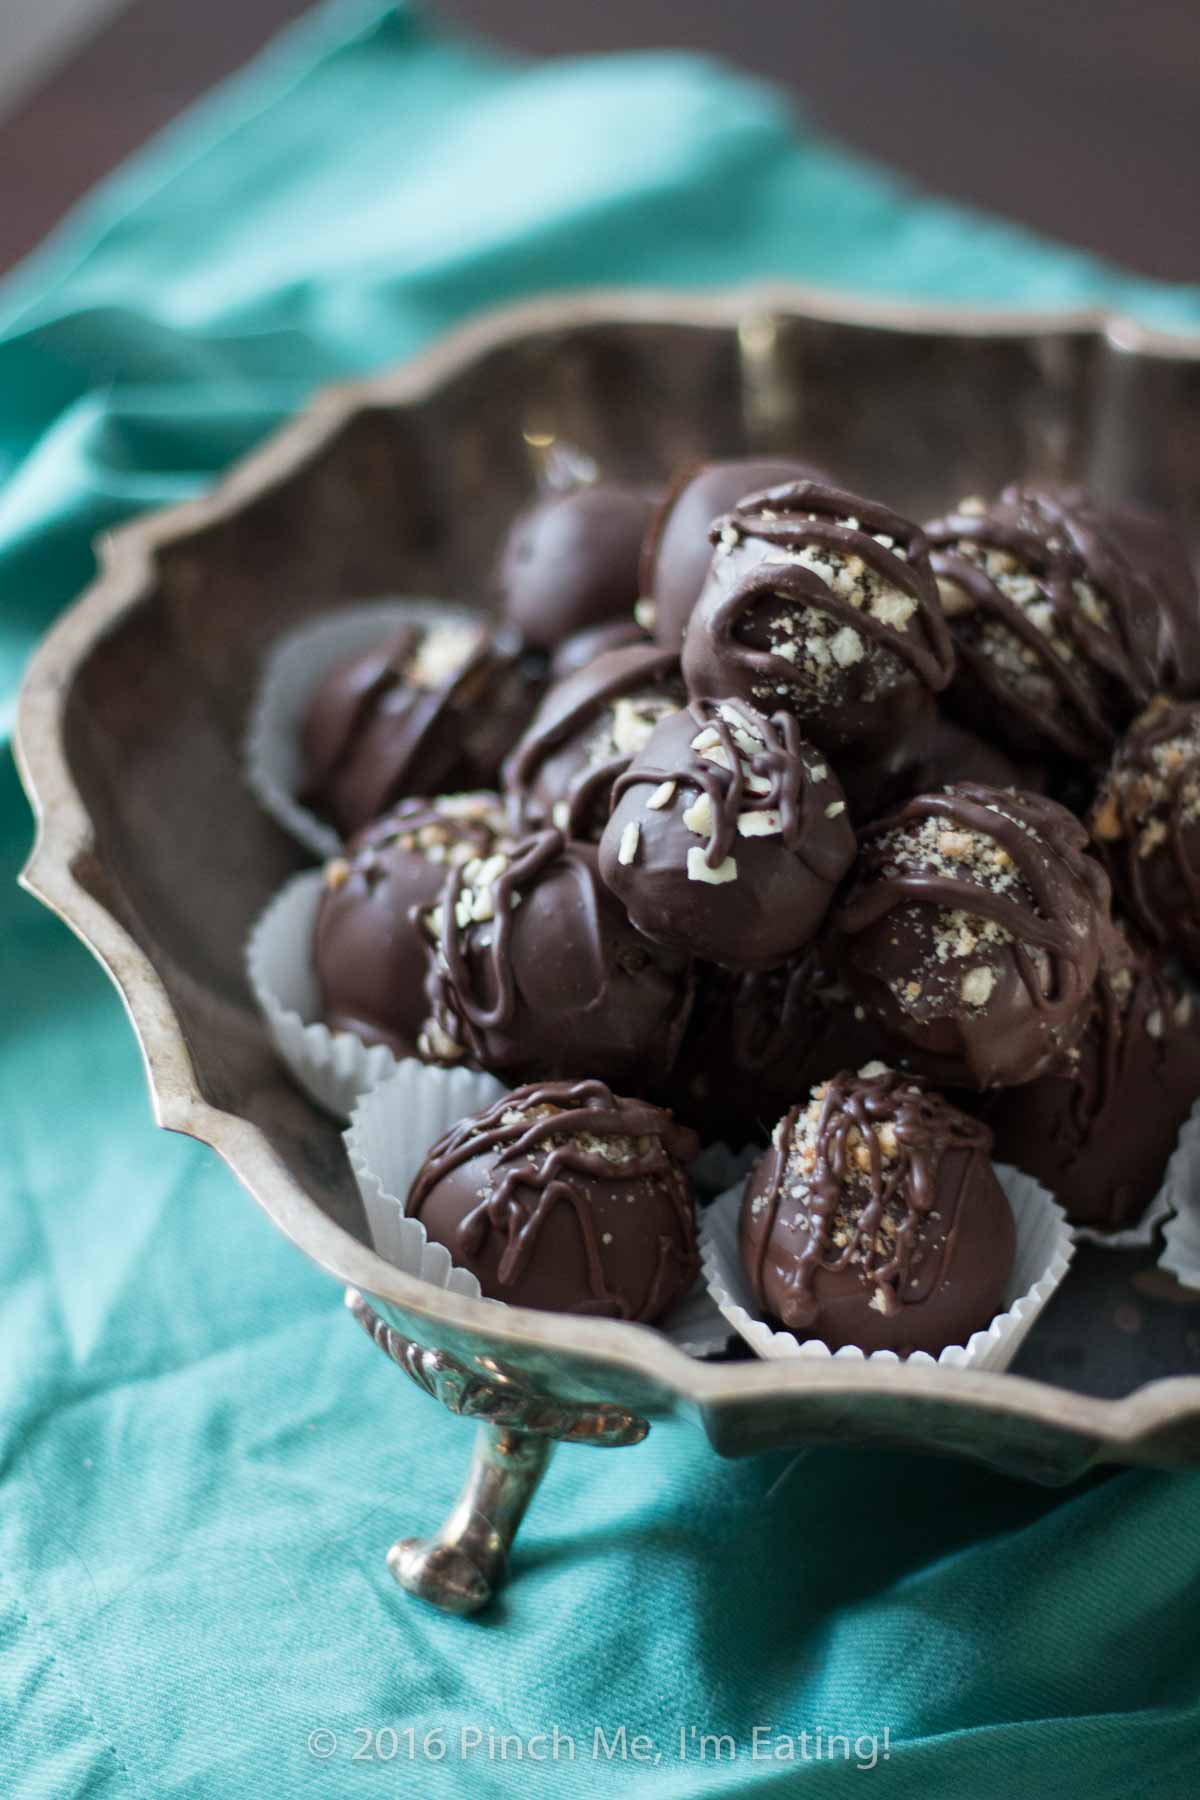
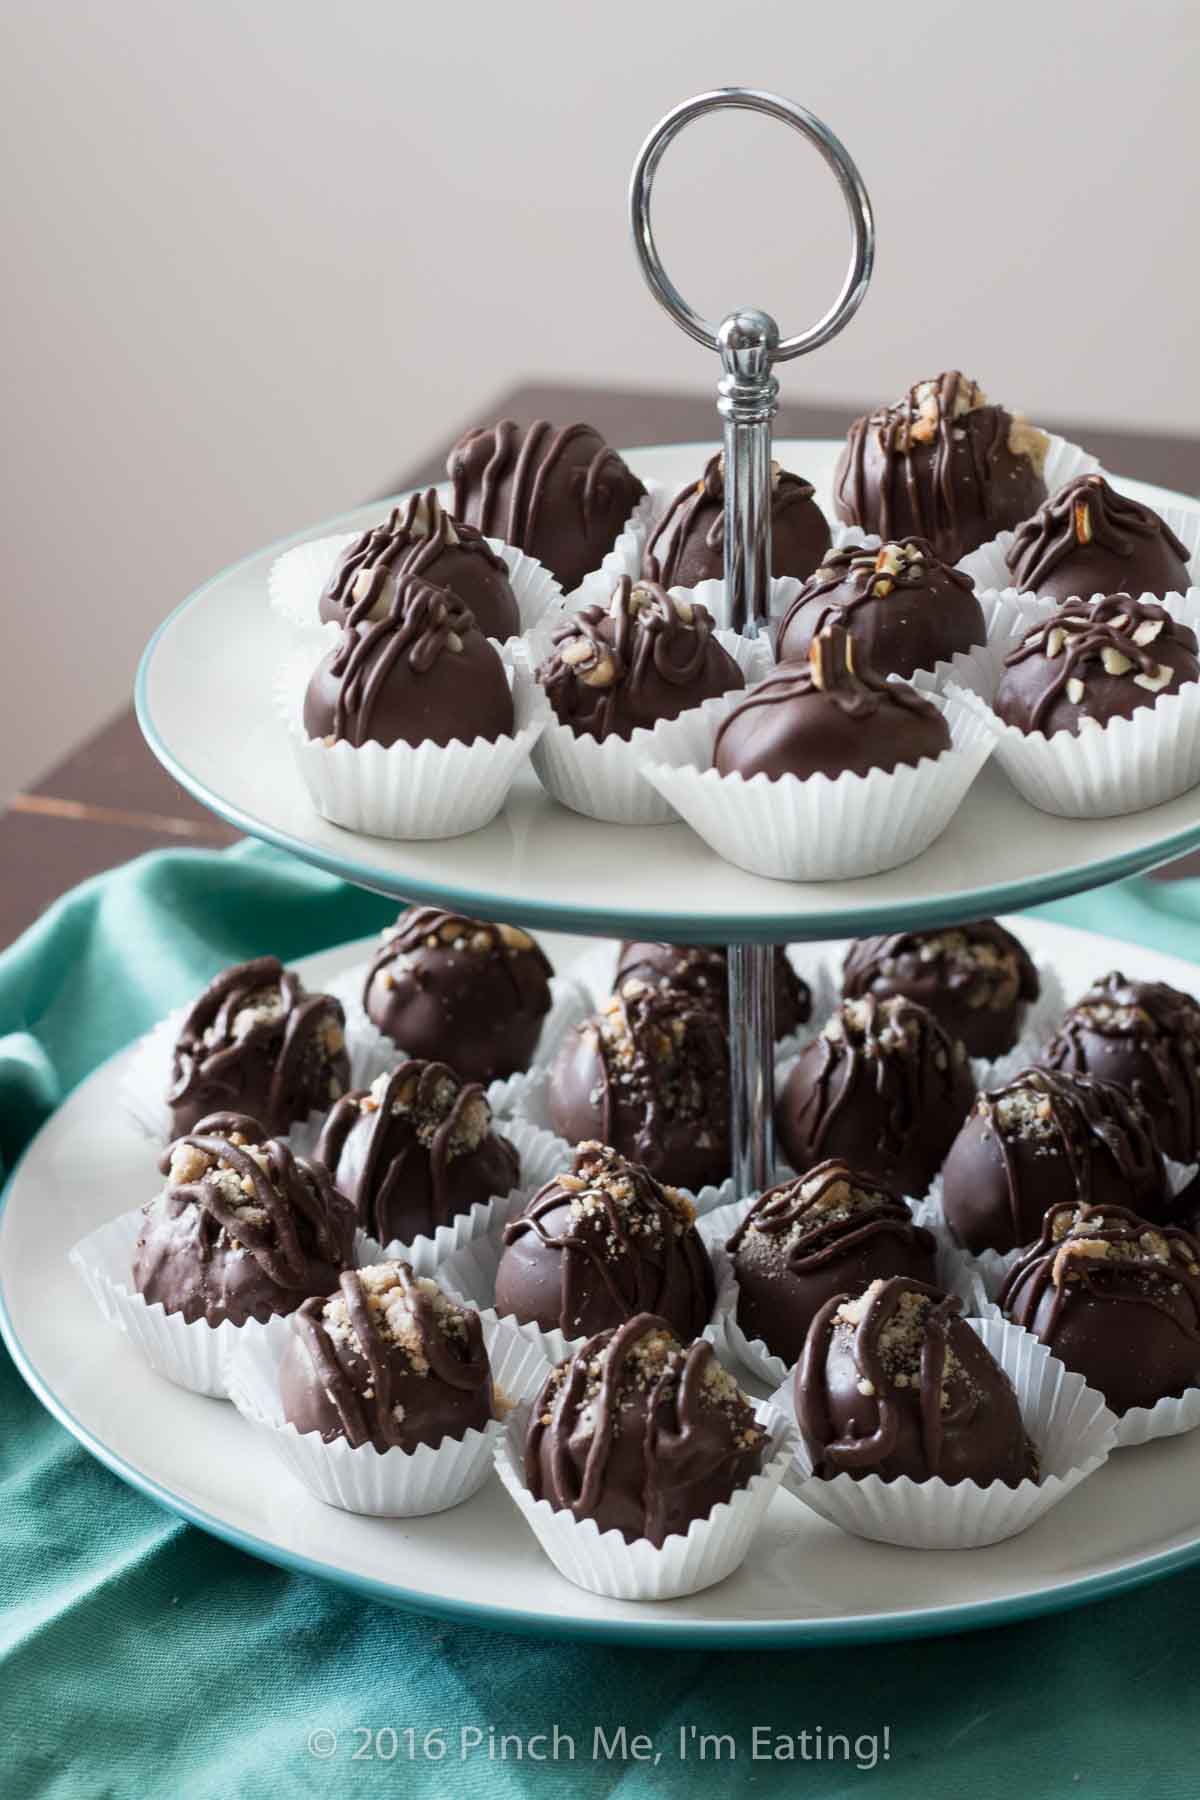
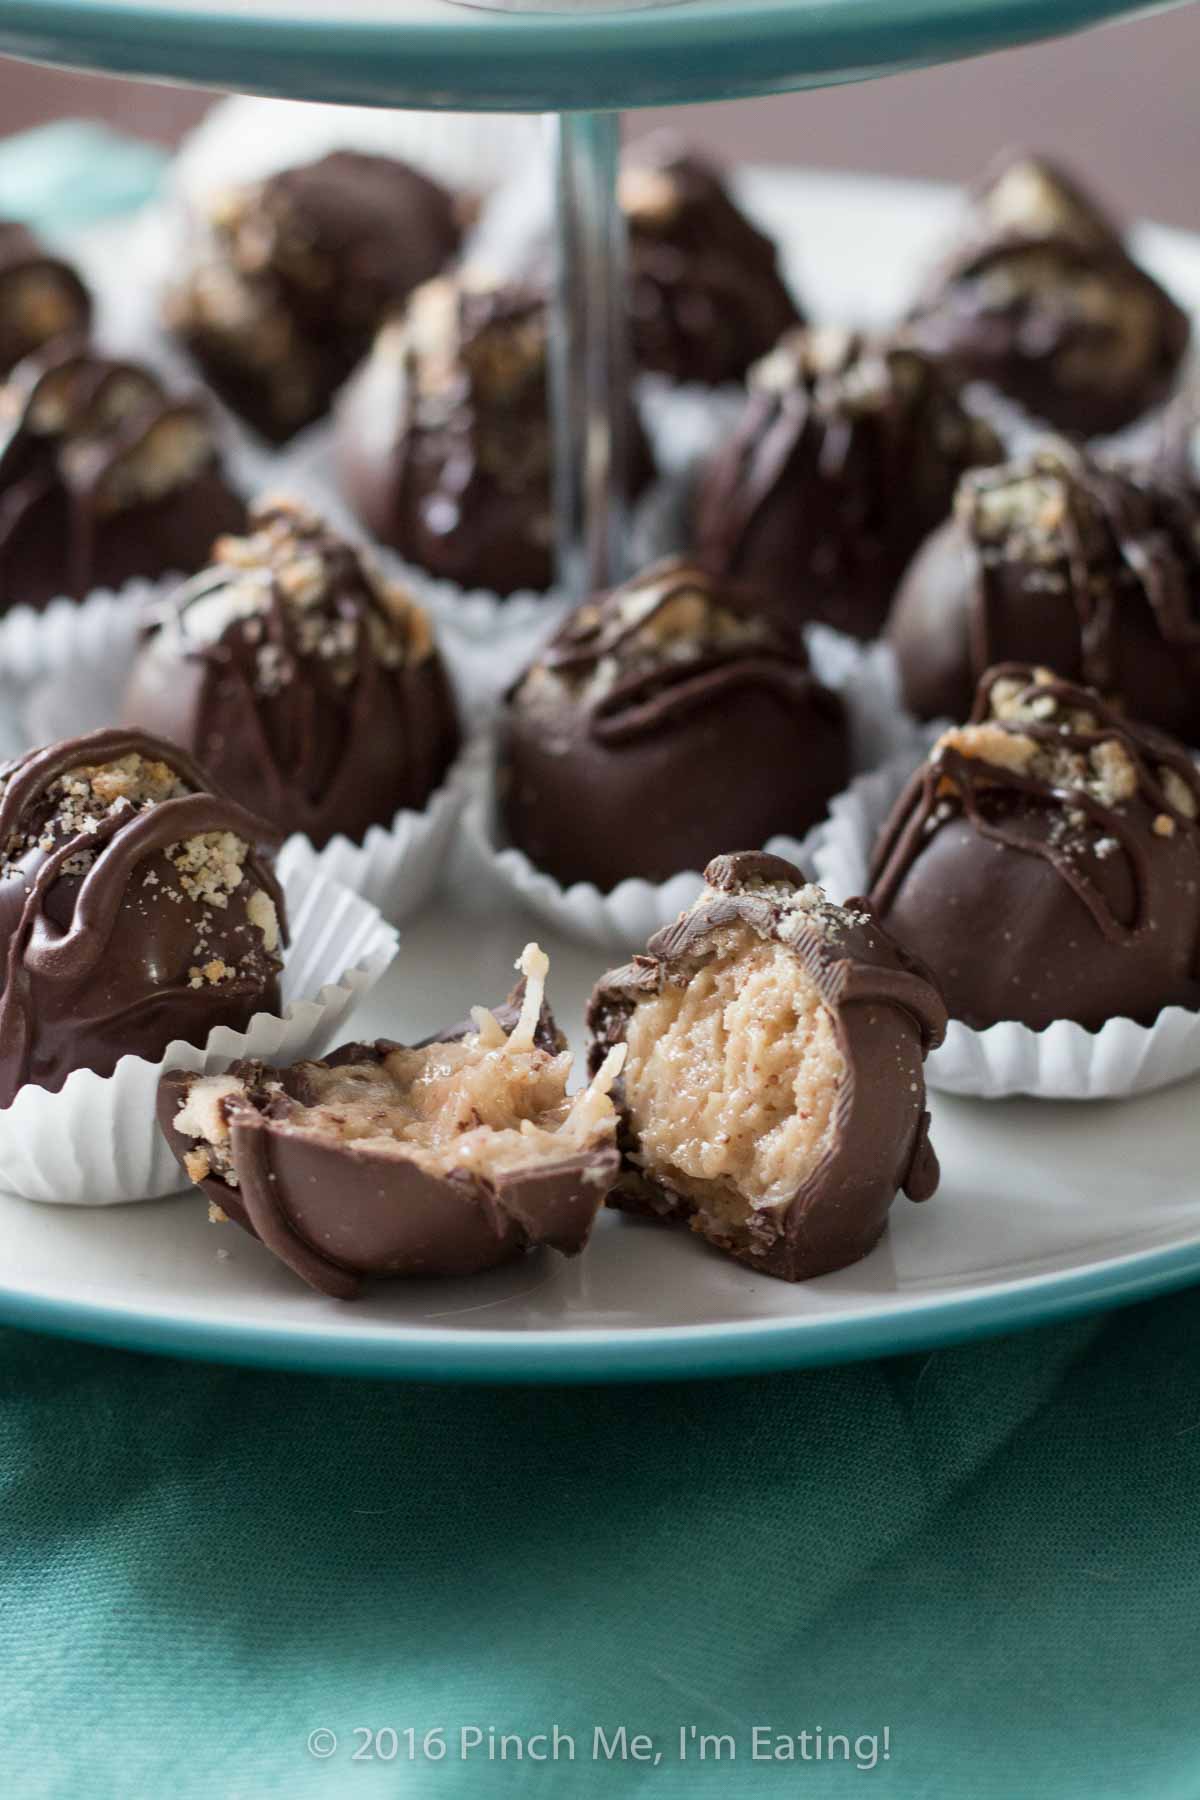
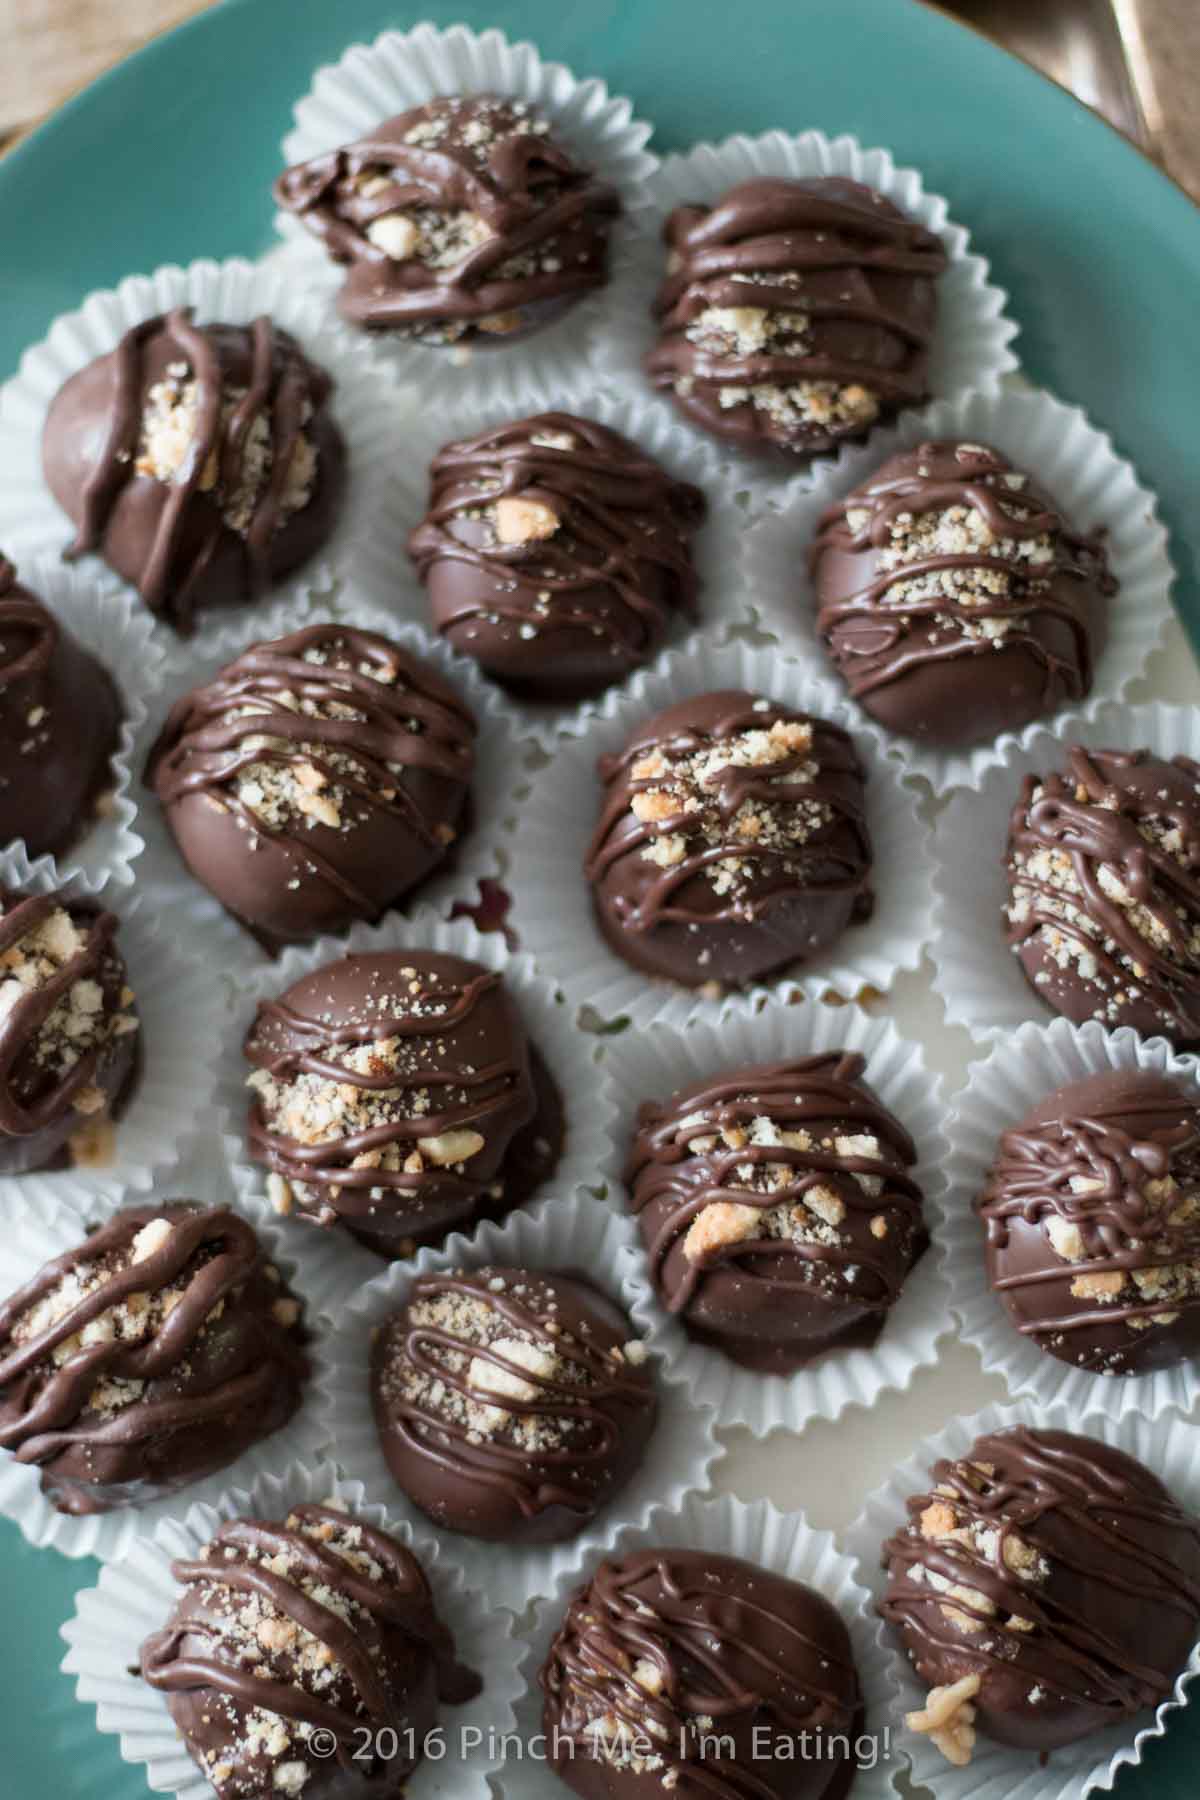
A tiny drizzle of chocolate and some crushed almonds and sea salt on top not only looks beautiful, but hides any lumps and bumps that may have occurred in the chocolate coating process. These look and taste like something you’d buy in a shop.
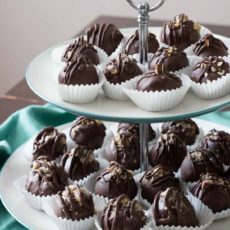
And the best thing is, you end up with like twenty of them. Yessss. These make perfect gifts for friends or sweethearts, or you can have a few for dessert after an at-home date night.
I originally wrote this recipe in 2016 as a way to highlight the unique flavor of some Brazil nut butter I had gotten without using too much of it. These bonbons are truly a great way to showcase unique nut butters like macadamia butter or cashew butter.
I’ve revised the recipe to call for almond butter, which is much more easily available and is a pantry staple for many people, but if you have something more unique, go ahead and use that instead! Peanut butter also works!

Ingredients
How to make Almond Coconut Bonbons
These bonbons are super beginner friendly to make and don’t require any special equipment! Just parchment paper, some toothpicks, and a zip-top baggie for drizzling chocolate.
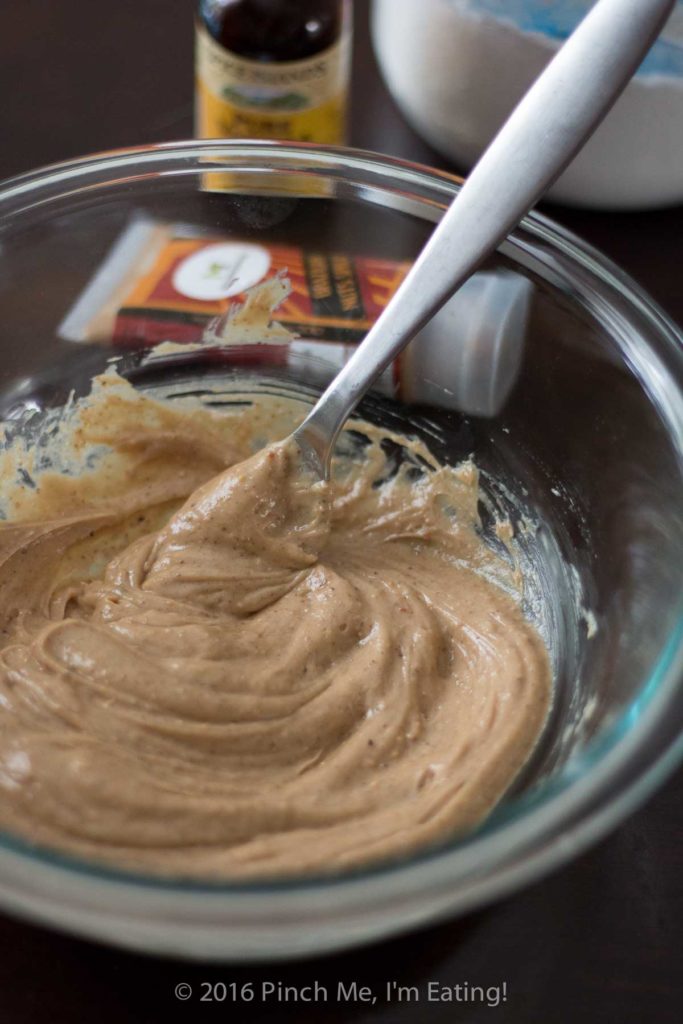
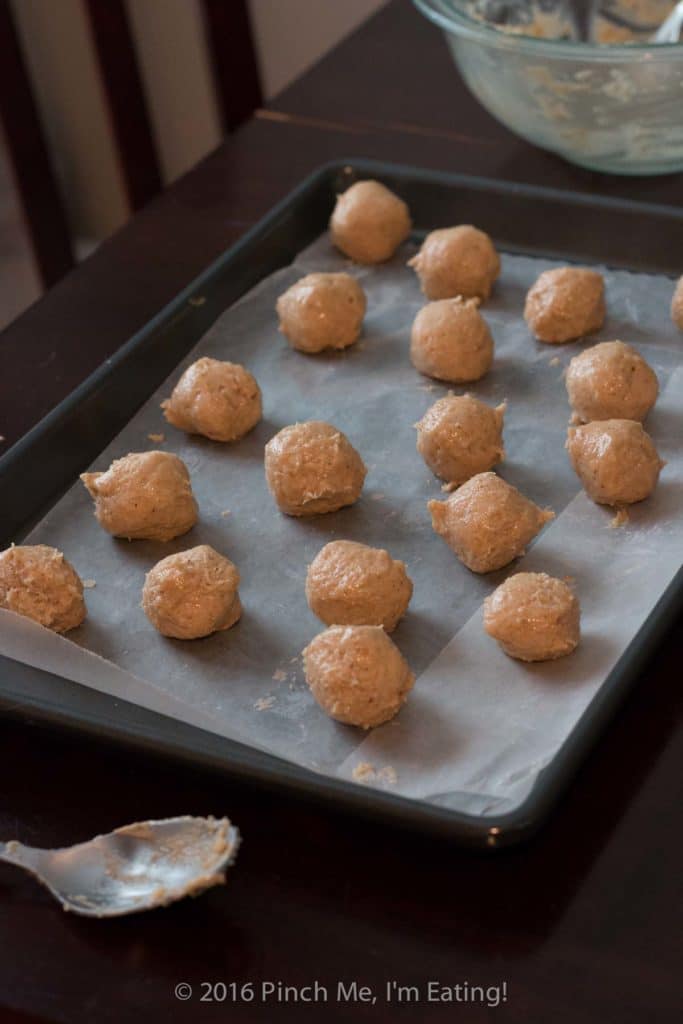
Mix the filling. Mix together butter, almond butter, coconut cream, shredded coconut, powdered sugar, vanilla, and kosher salt. For a smoother filling (great for smaller bonbons or bonbons made in a mold), puree the filling in a mini food processor. Chill.


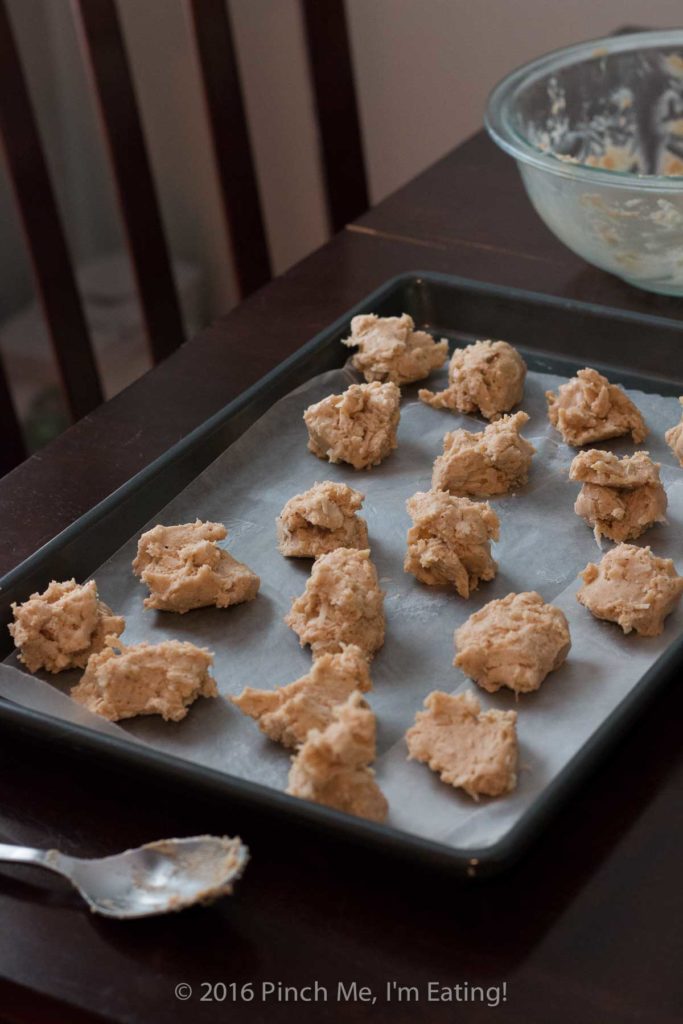
Make small balls of filling. Scoop the filling into 1/2 tablespoon portions and roll into balls with clean hands. Your hands will end up buttery. The filling will have softened up again by now, so chill it again in the fridge until you're ready to coat them.
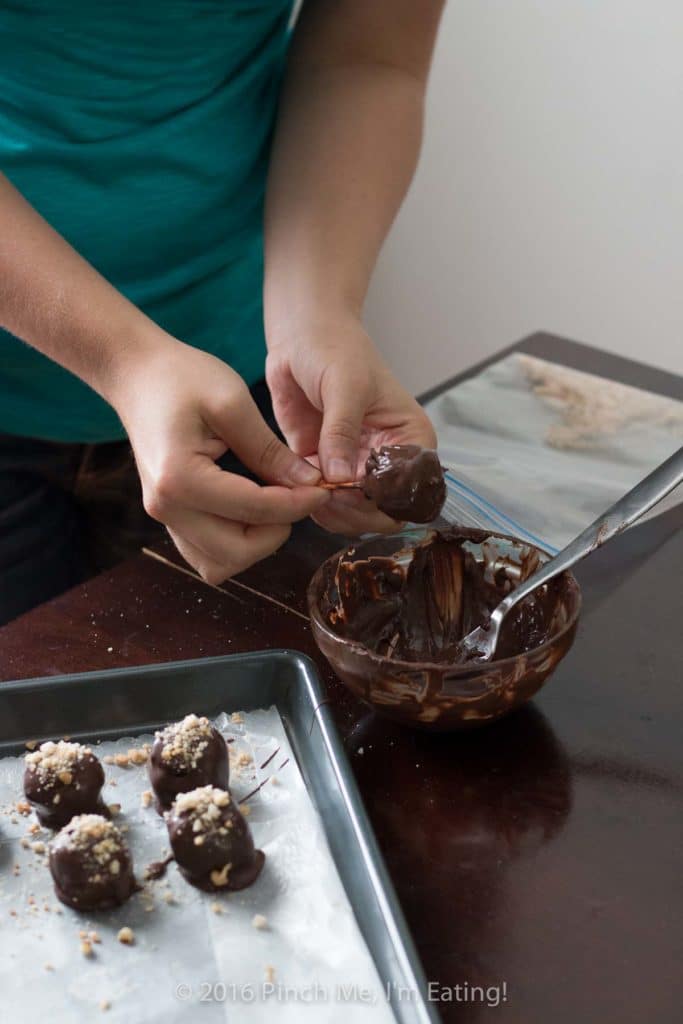
Dip in melted chocolate wafers. Melt chocolate wafers according to the package directions (or prepare some tempered chocolate if you know how!) Take the filling balls out of the fridge about 3-5 at a time and roll them in melted chocolate wafers. Scoop coated bonbons up with a fork, drip off excess chocolate, and push gently onto parchment paper with a toothpick. After the chocolate hardens, fill in any little holes in the chocolate with more melted chocolate on a toothpick or fork.
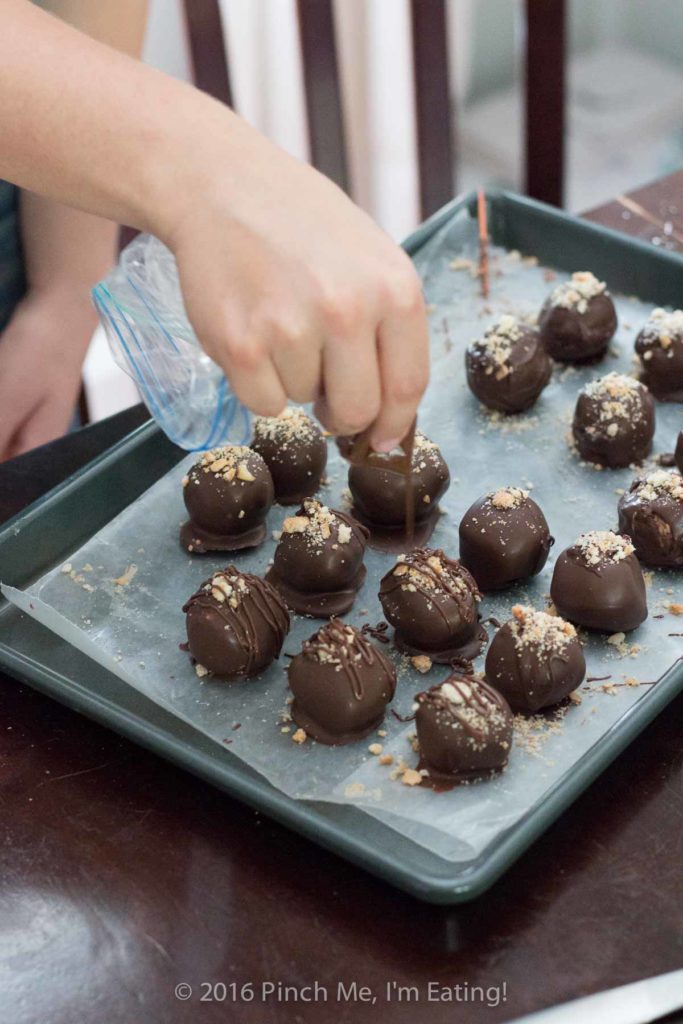
Add toppings. Drizzle bonbons with additional chocolate and quickly add finely chopped nuts and sea salt before the chocolate hardens. If you want, you can drizzle with a little additional chocolate to help hold down the toppings.
Enjoy! Eat either chilled or at room temperature. These make great gifts!
Tips & Tricks
- Make sure the balls are entirely coated in chocolate — filling will leak out of any little holes in the filling as it comes to room temperature! After your initial coating, before you add the drizzle on top, check for any little holes in the chocolate and fill them in with additional chocolate.
- Mini muffin liners make great bonbon liners.
- If you are comfortable tempering chocolate, do that instead of using chocolate melting wafers!
- Refrigerate, don't freeze: Freezing the filling balls before coating them in chocolate may cause the chocolate coating to crack. Refrigerate instead, and just remove them a couple at a time to coat so they are firm enough.
- Using a chocolate mold: Instead of making filling balls and then coating them in chocolate, you can make chocolate shells and fill them instead. First, fill a silicone chocolate mold with chocolate and drip out any excess to form a chocolate shell. Use a zip top baggie to pipe the filling (not chilled) into the chocolate shells, leaving a little room at the top for additional chocolate.
Tap the mold gently on the table to allow the filling to settle into the chocolate shells so there are no air bubbles. Add chocolate to fill the molds to the top and clean up any excess with a spatula.
Once hardened, pop the bonbons out of the molds and add chocolate drizzle and toppings. These look super professional!
More dessert recipes you'll love


Be sure to FOLLOW ME on FACEBOOK, PINTEREST, INSTAGRAM, and TWITTER for more great recipe ideas! Or SIGN UP for my EMAIL NEWSLETTER to get updates and recipes straight to your inbox!
Almond Coconut Bonbons (Beginner friendly!)
Ingredients
- ¼ cup butter softened
- ⅓ cup almond butter or other gourmet nut butter, like Brazil nut, cashew, or macademia nut butter
- ⅓ cup powdered sugar See note
- 2 tablespoons coconut cream use the cream that separates out on top of a full-fat can of coconut milk - don't shake it up before opening the can!
- 1 teaspoon vanilla
- ¼ teaspoon kosher salt
- ½ cup unsweetened shredded coconut
- 10 oz Ghirardelli dark chocolate melting wafers
- Finely chopped almonds and flaky sea salt for topping
Instructions
- Mix together butter, almond butter, powdered sugar, coconut cream, vanilla, and kosher salt in a medium bowl until smooth. (Sifting the powdered sugar helps avoid any lumps.) Stir in shredded coconut until fully incorporated.If desired, puree the mixture in a mini food processor for a smoother filling (I prefer it this way, and you can mix everything straight in there instead of using a bowl first!)
- Chill filling for at least an hour until firm.
- Measure out half-tablespoon-sized lumps of filling onto a baking sheet lined with parchment paper. Roll each lump into a smooth ball between the palms of your hands. Work quickly, as the filling softens quickly. Note: Your hands will end up buttery.
- Return to the refrigerator for about half an hour until balls are firm again. Do not freeze (see note).
- Melt 8 oz. chocolate melting wafers in a small bowl according to package directions.
- Take balls of filling out of the fridge 3-5 at a time, leaving the rest to stay chilled while you work.
- Roll each filling ball in the bowl of chocolate until coated. Scoop each one out with a fork (don't stab it), let excess chocolate drip off, and rest on the parchment paper.
- When all truffles are coated, spoon any remaining chocolate into a zip top bag and cut a tiny corner off. Drizzle tops of truffles with chocolate and immediately sprinkle on flaky sea salt and finely chopped almonds before the drizzle hardens. A little additional drizzle afterwards can help the toppings stick.
- Eat one immediately because you deserve it. Then store the rest in the refrigerator for up to a week and serve chilled or room temperature.
They turned out beautifully! I’ve always been hesitant about the wafers for the same reason- I was worried that wouldn’t taste like chocolate- but now I think I will give them a try. Less finicky than tempering chocolate 🙂
Thanks, Rachel! You can definitely tell the difference between brands, but if you can find the Ghirardelli wafers at Target, go for it! I’ll definitely be using them again.
Wow, these look fantastic! I need to work on my chocolate tempering skills – yours look perfect!
I cheated and used the Ghirardelli dark chocolate melting wafers, so I didn’t have to temper anything! I know you’re a purist, but you should consider trying them – they taste wayyy better than the normal Wilton and Candiquik “melting chocolate.” They’re so delicious and easy!