
Easy Glazed Fresh Orange Scones
My absolute favorite scone recipe, these mini orange scones use fresh orange zest and an orange juice glaze for an absolutely addictive bakery-style treat. With hints of vanilla and cardamom spice, these easy scones are flaky-crumbly, moist, and come together in just 30 minutes with minimal effort! You’ll swear these are better than Panera!
These scones use my Easy Plain Scones recipe as a base: perfectly flaky and crumbly while remaining moist and flavorful!

This recipe was first published on October 8, 2016 and updated with helpful content and new photos April 1, 2022.
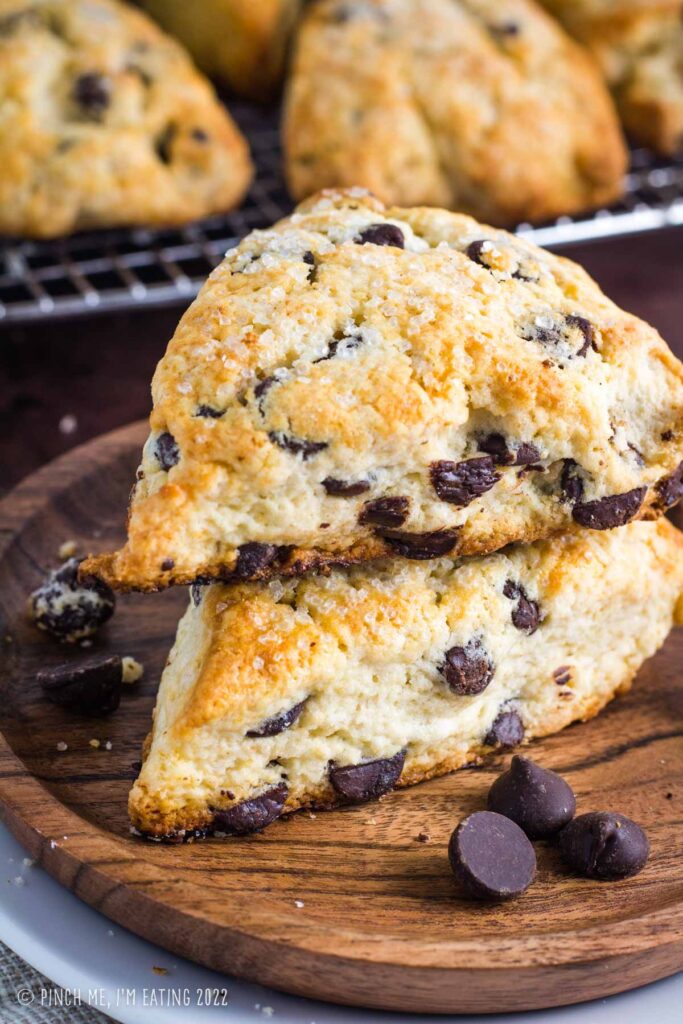
As an afternoon tea lover, I’m also a bit of a scone aficionado. While my chocolate chip scones are my husband’s favorite recipe, I think the best ones I’ve created are these easy glazed orange cardamom scones. Check out my other scone recipes to find your favorite!
While these scones rival (or, in my opinion, surpass) the orange scones from Panera, their inspiration was not, in fact, the popular chain restaurant. These were inspired by an orange cardamom ice cream I had at Kem CoBa on my honeymoon in Montreal. I loved the flavor combination so much I made it into a scone, and it’s absolute perfection!
Every time I make these scones I remember why they’re my favorite! In just 30 minutes from start to finish, they can be on your table and IN YOUR MOUTH too and you can see if you agree with me!
Better than Panera’s orange scones!
This is not exactly a Panera copycat orange scone recipe, but I think they’re even better! Here are the differences I noticed:
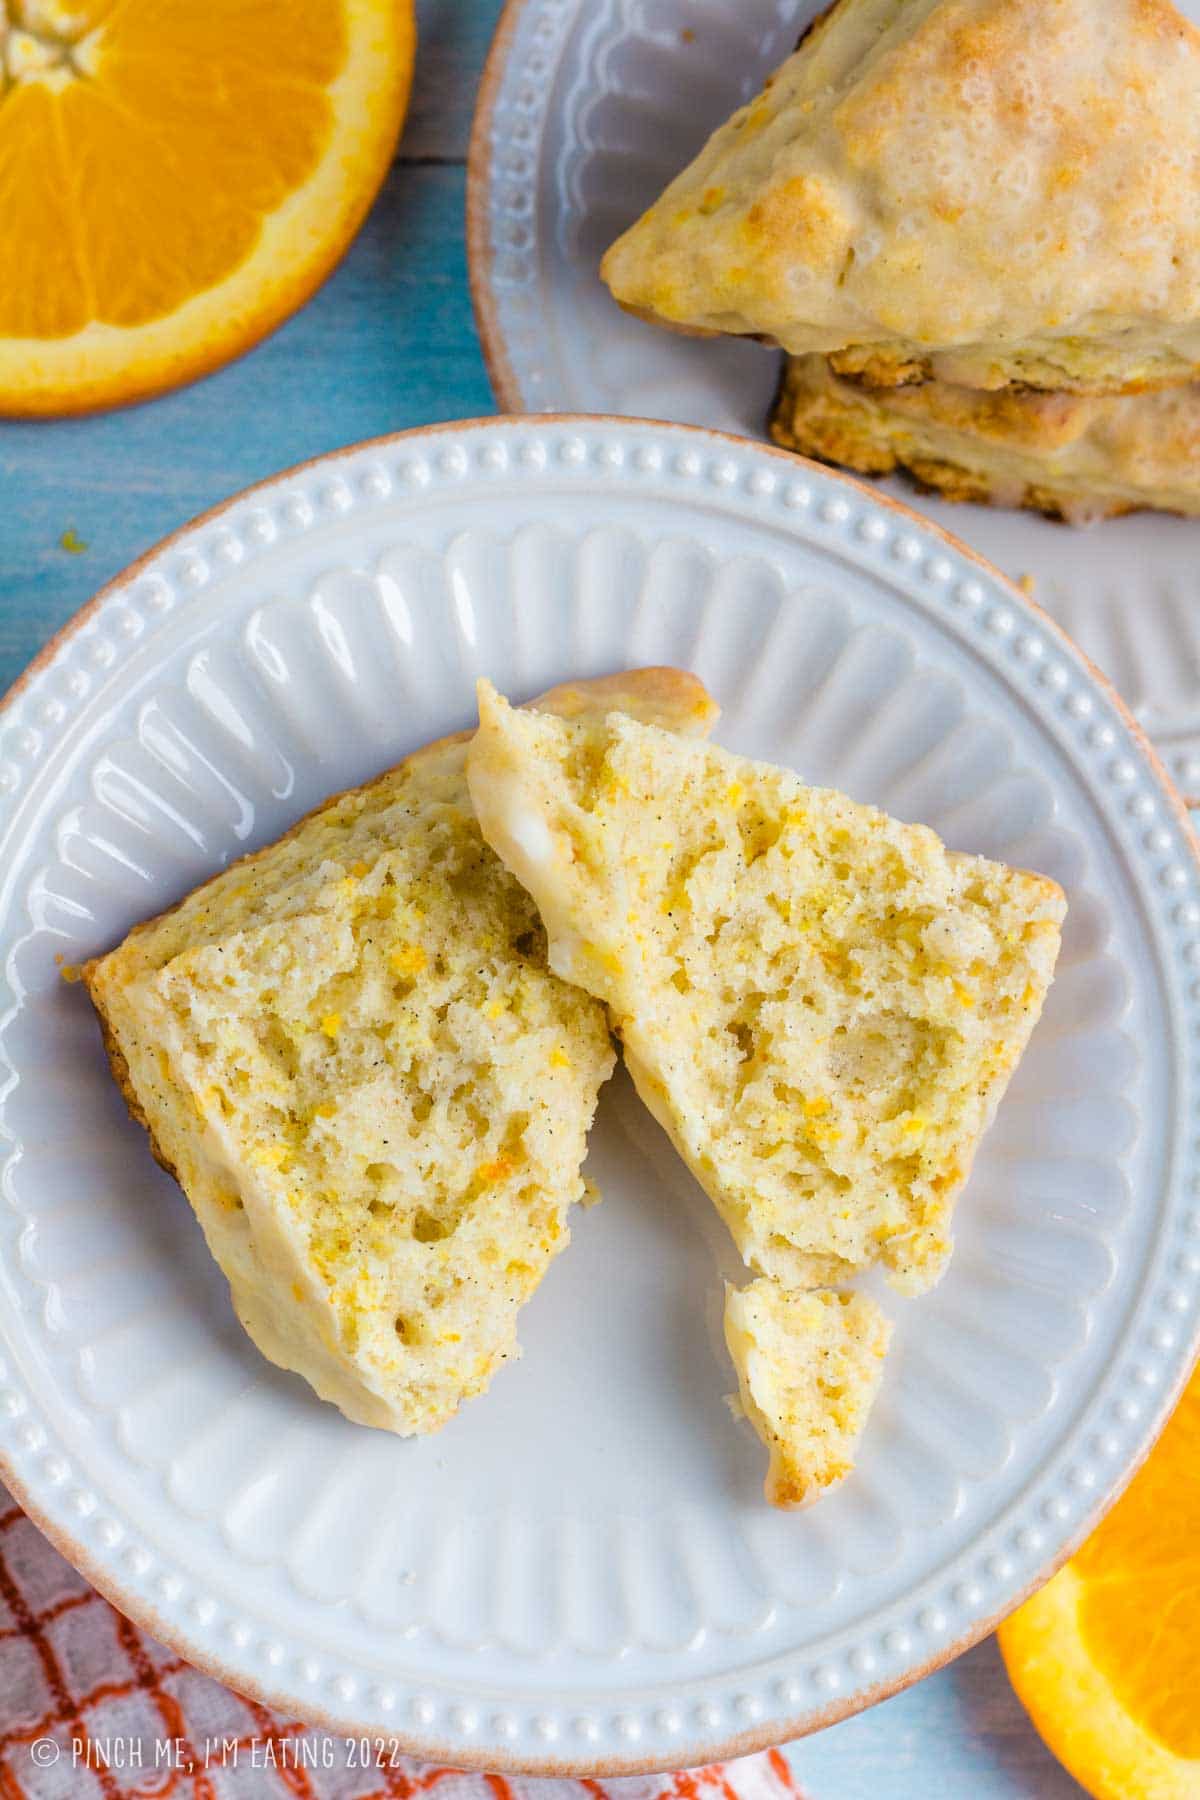
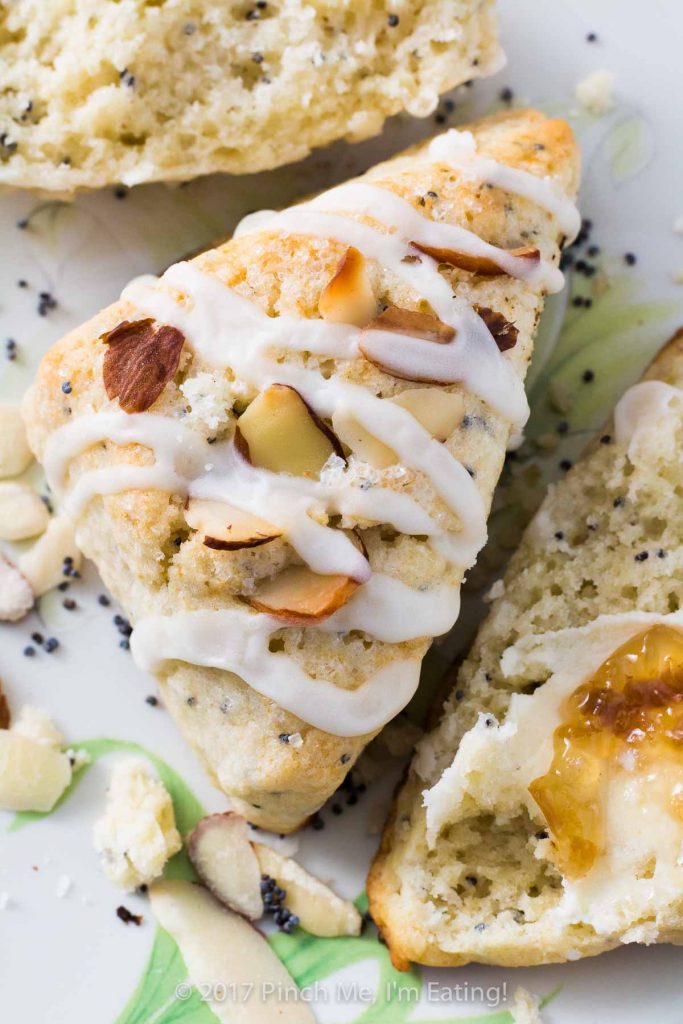
- These scones use butter and cream, giving them a flaky, moist interior and a rich flavor. Panera’s orange scones are cream-only scones, giving them a cakier texture. See the above photo for how nicely they flake apart!
- These orange scones are lightly sweet, making them perfect to eat on their own but not too sweet to spread with jam or other toppings. Panera orange scones are a bit sweeter, so they’re best eaten on their own.
- Panera’s orange scones are sweetened with sugar and corn syrup, while this recipe uses only granulated sugar.
- This recipe makes mini scones, while Panera’s are larger. If you prefer a large scone, I’ve included instructions below on how to make that adaptation!
- Panera’s scones are only flavored with orange, while these also include vanilla and cardamom for a more complex flavor. You may leave out the vanilla and cardamom if you want an orange-only scone.
Ingredients you need
These scones require mostly staples you should already have in your pantry!
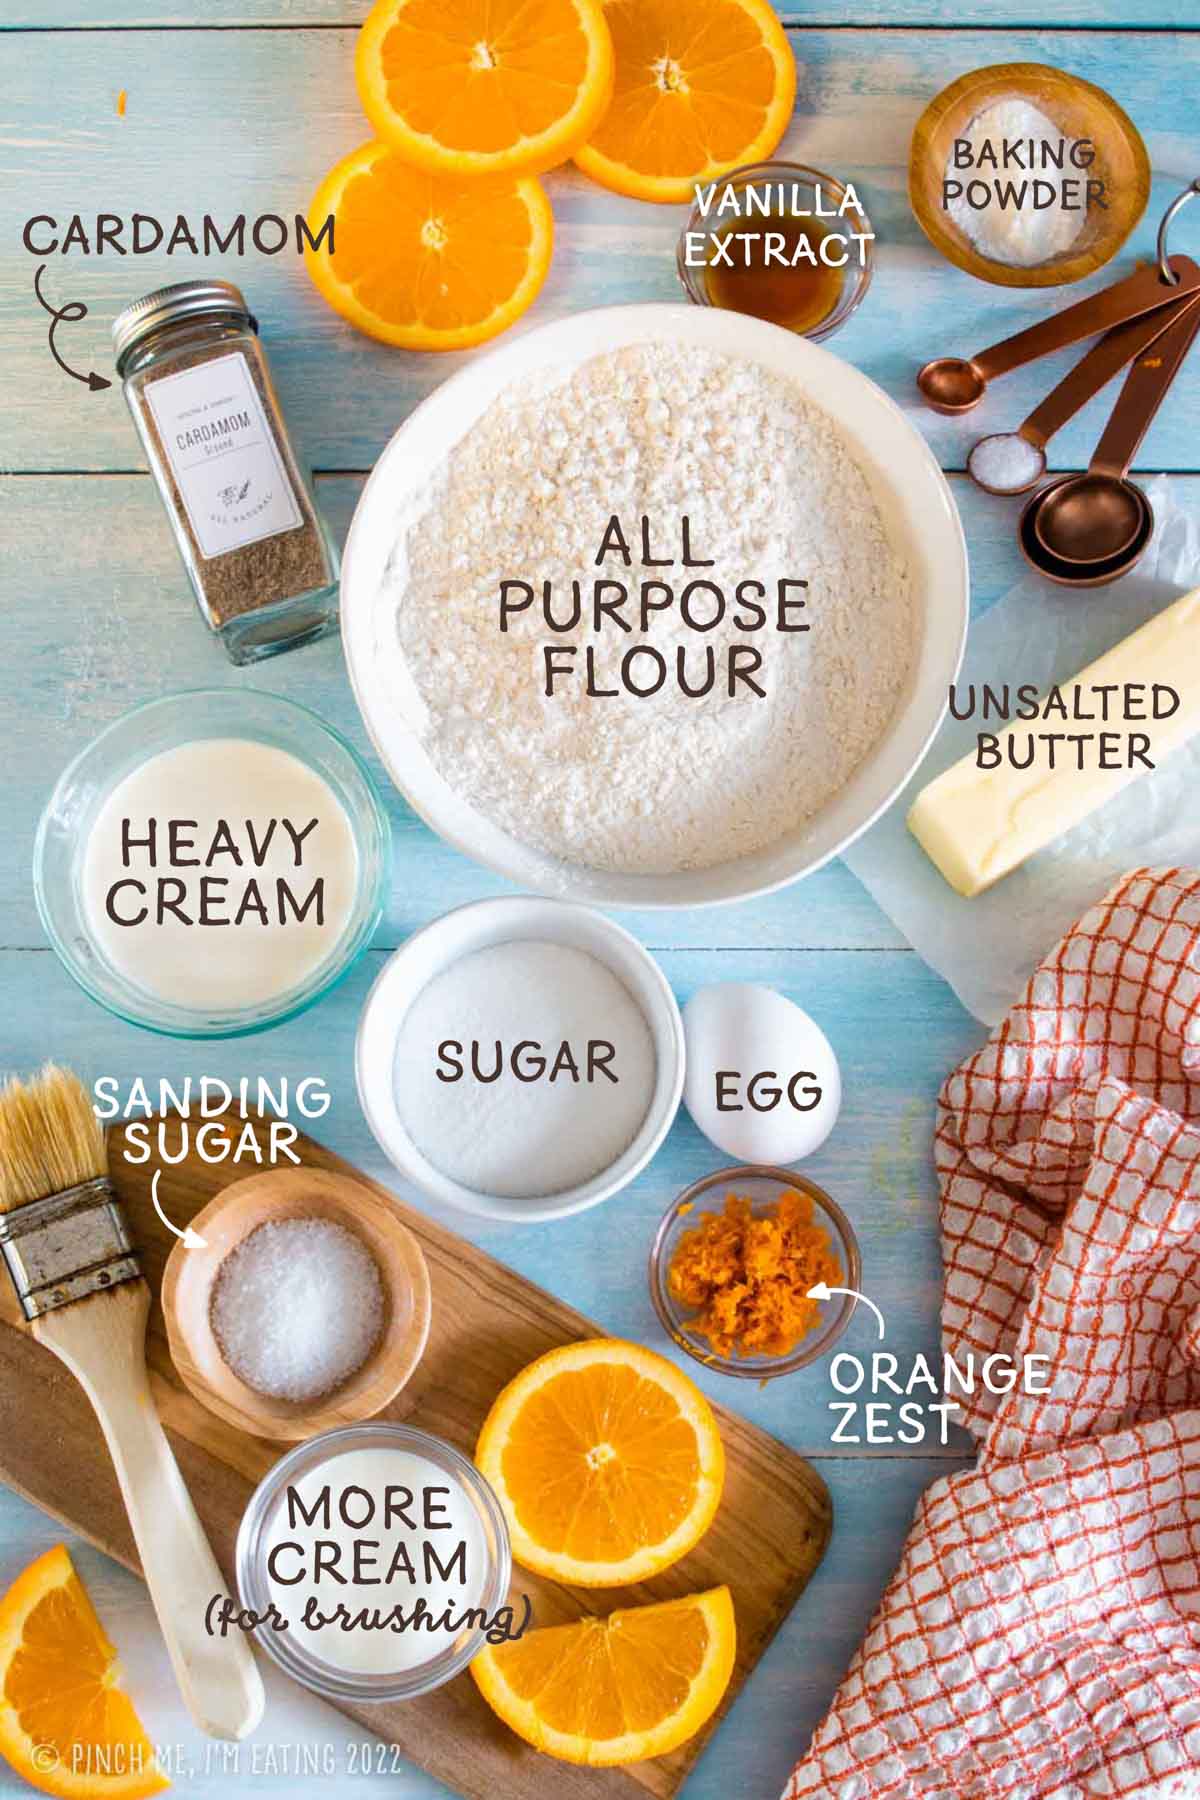
For these fresh orange scones, you’ll need:

How to Make Fresh Cardamom Orange Scones
These scones are so easy to make and can be ready in about 30 minutes!
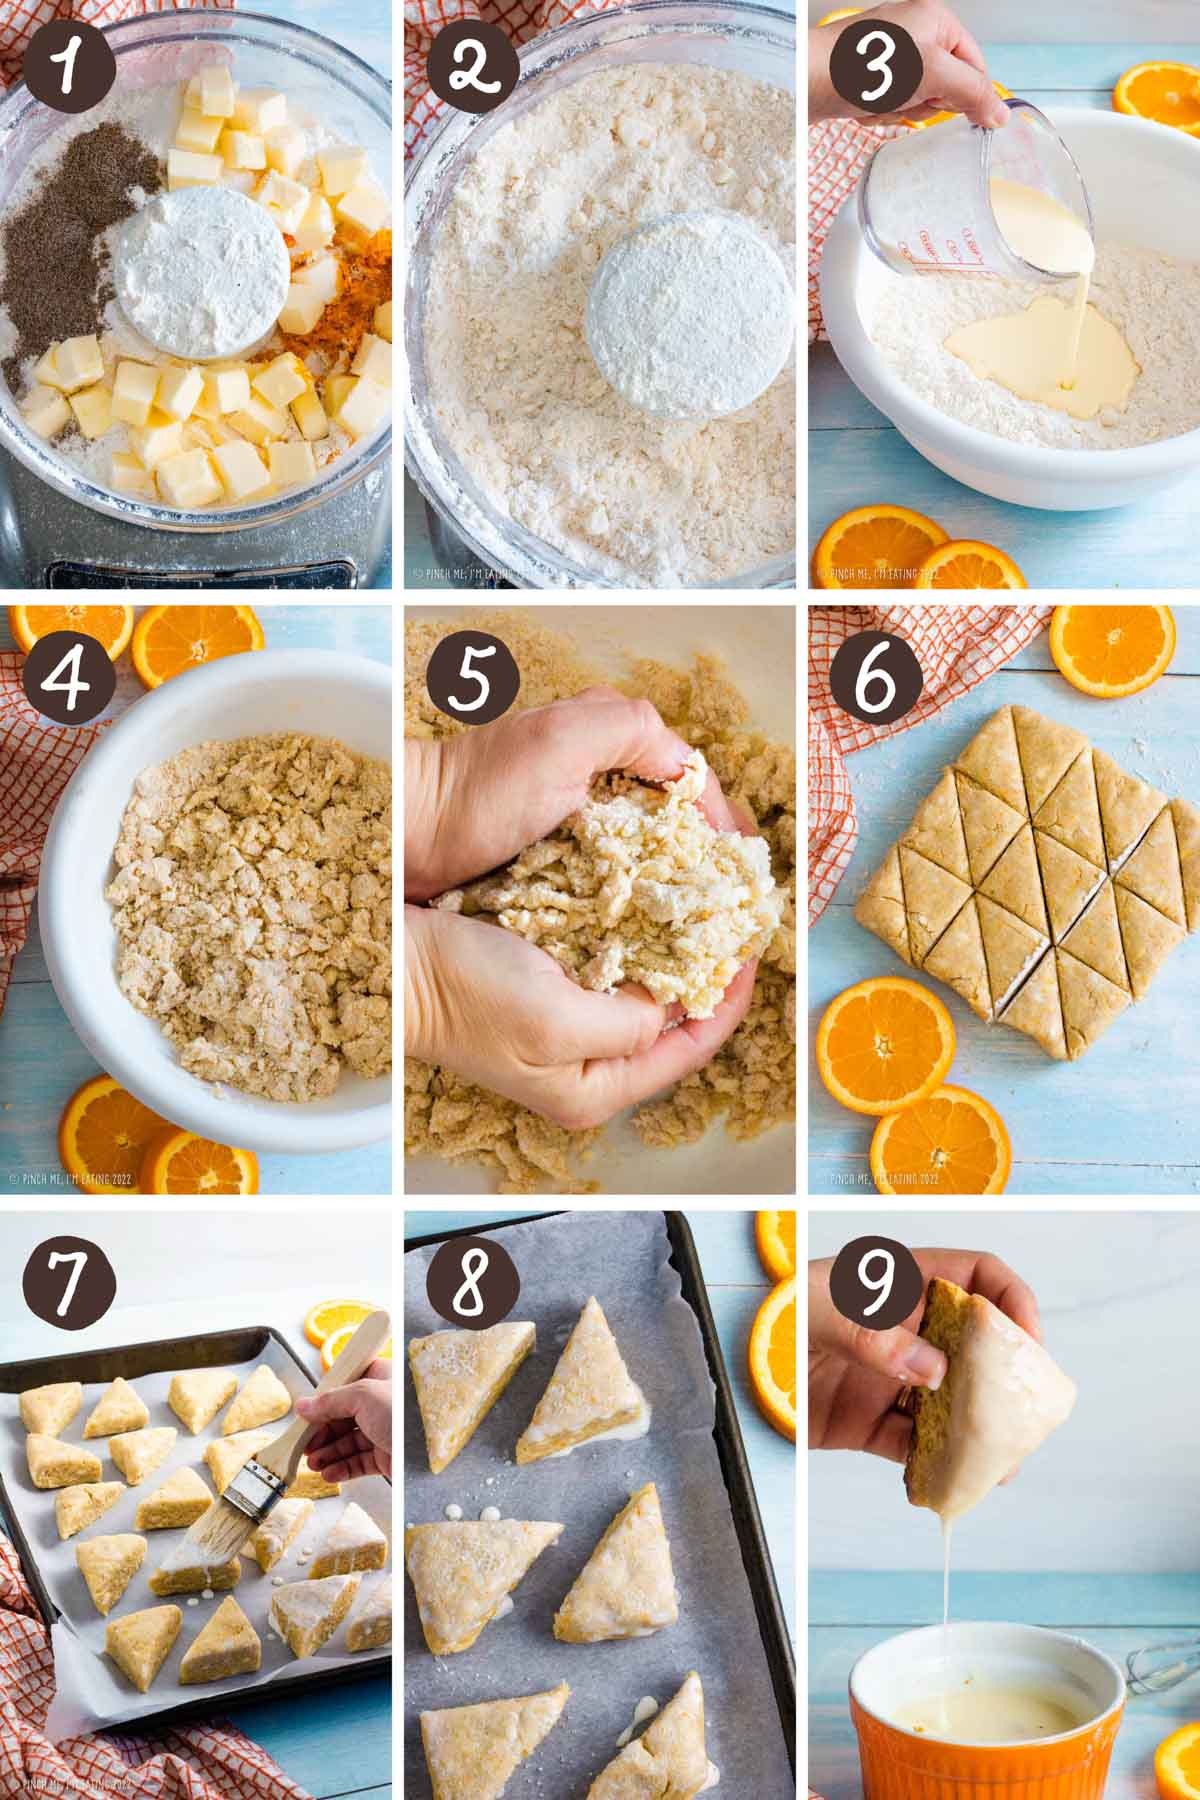
- Mix the dry ingredients with the orange zest and cardamom.
- Cut in the cold butter with a food processor, pastry blender, or your fingertips (I love using my food processor for this!).
- Mix in wet ingredients and vanilla until a crumbly dough just starts to form. Do not overwork the dough!
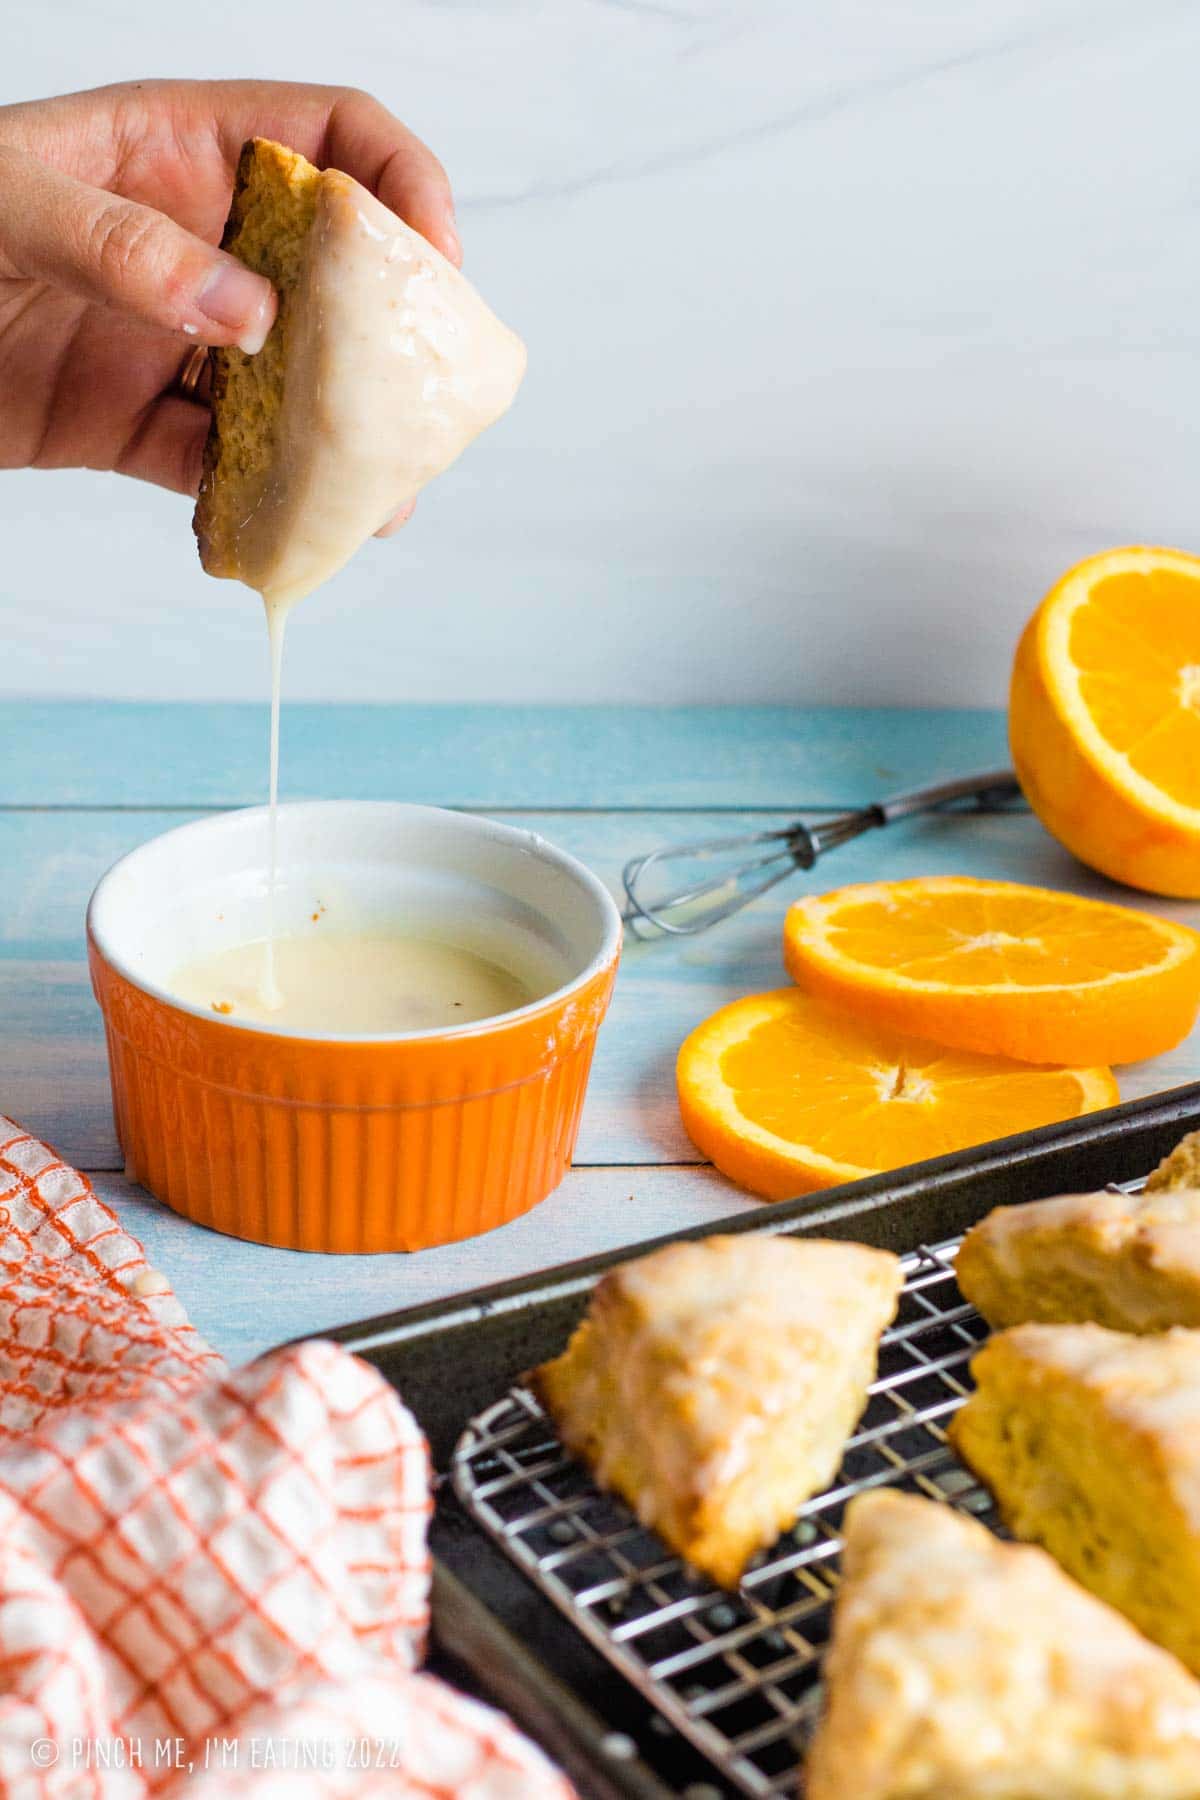
- Shape and cut your scones. Brush with cream to add a subtle gloss and aid in browning, and sprinkle with coarse sanding sugar for a nice glittery exterior.
- Make the glaze while your scones are baking.
- Dip the tops of the scones in the glaze and let them dry on a cooling rack. Enjoy!
Expert Tips for Making Perfect Scones
- Make sure to use an aluminum-free baking powder like Rumford. Some popular brands like Clabber Girl contain sodium aluminum sulfate, which can make your baked goods taste bitter or metallic. Your baking powder should be free from lumps and not older than 6 months to a year.
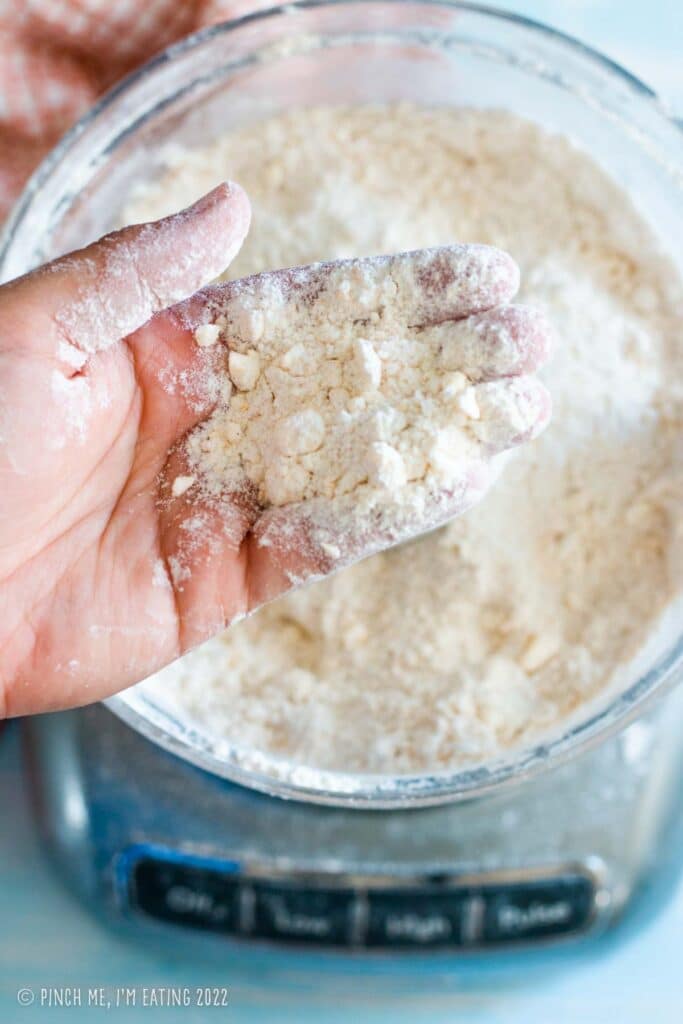
- Keep your butter in the fridge until you’re ready to add it. Steam created during baking from the cold butter helps create the flaky layers of your scones. Leaving some larger pieces of butter up to the size of a pea when you cut it into the dry ingredients will make your scones extra flaky and delicious.
- Don’t overwork the dough after you add your wet ingredients. This will develop a gluten network, which is great for sturdier baked goods like bread or pizza dough, but will make your scones tough. The dough will be pretty dry but minimize handling it — just enough for the dough to come together into a disk.
- When cutting your dough into wedges or using a cookie cutter, use a straight down and up motion rather than sliding the knife across or twisting the cutter. Twisting or sliding will interfere with the way the scones rise on the edges.
- Be sure to let the glaze harden completely before storing your scones, otherwise they will stay tacky forever.

Troubleshooting and FAQs
More Scone Recipes You’ll Love

Be sure to FOLLOW ME on FACEBOOK, PINTEREST, INSTAGRAM, and TWITTER for more great recipe ideas! Or SIGN UP for my EMAIL NEWSLETTER to get updates and recipes straight to your inbox!

Easy Glazed Fresh Orange Scones
Ingredients
- 2 cups flour
- 1/3 cup sugar
- 2 1/2 tsp baking powder
- 1/2 tsp ground cardamom
- Zest from 1 large orange
- 1/2 tsp salt
- 8 tbsp cold unsalted butter diced
- 1/2 cup heavy cream plus a little extra for brushing the tops of the scones
- 1 egg
- 1 tsp vanilla extract or vanilla bean paste
- Coarse sanding sugar
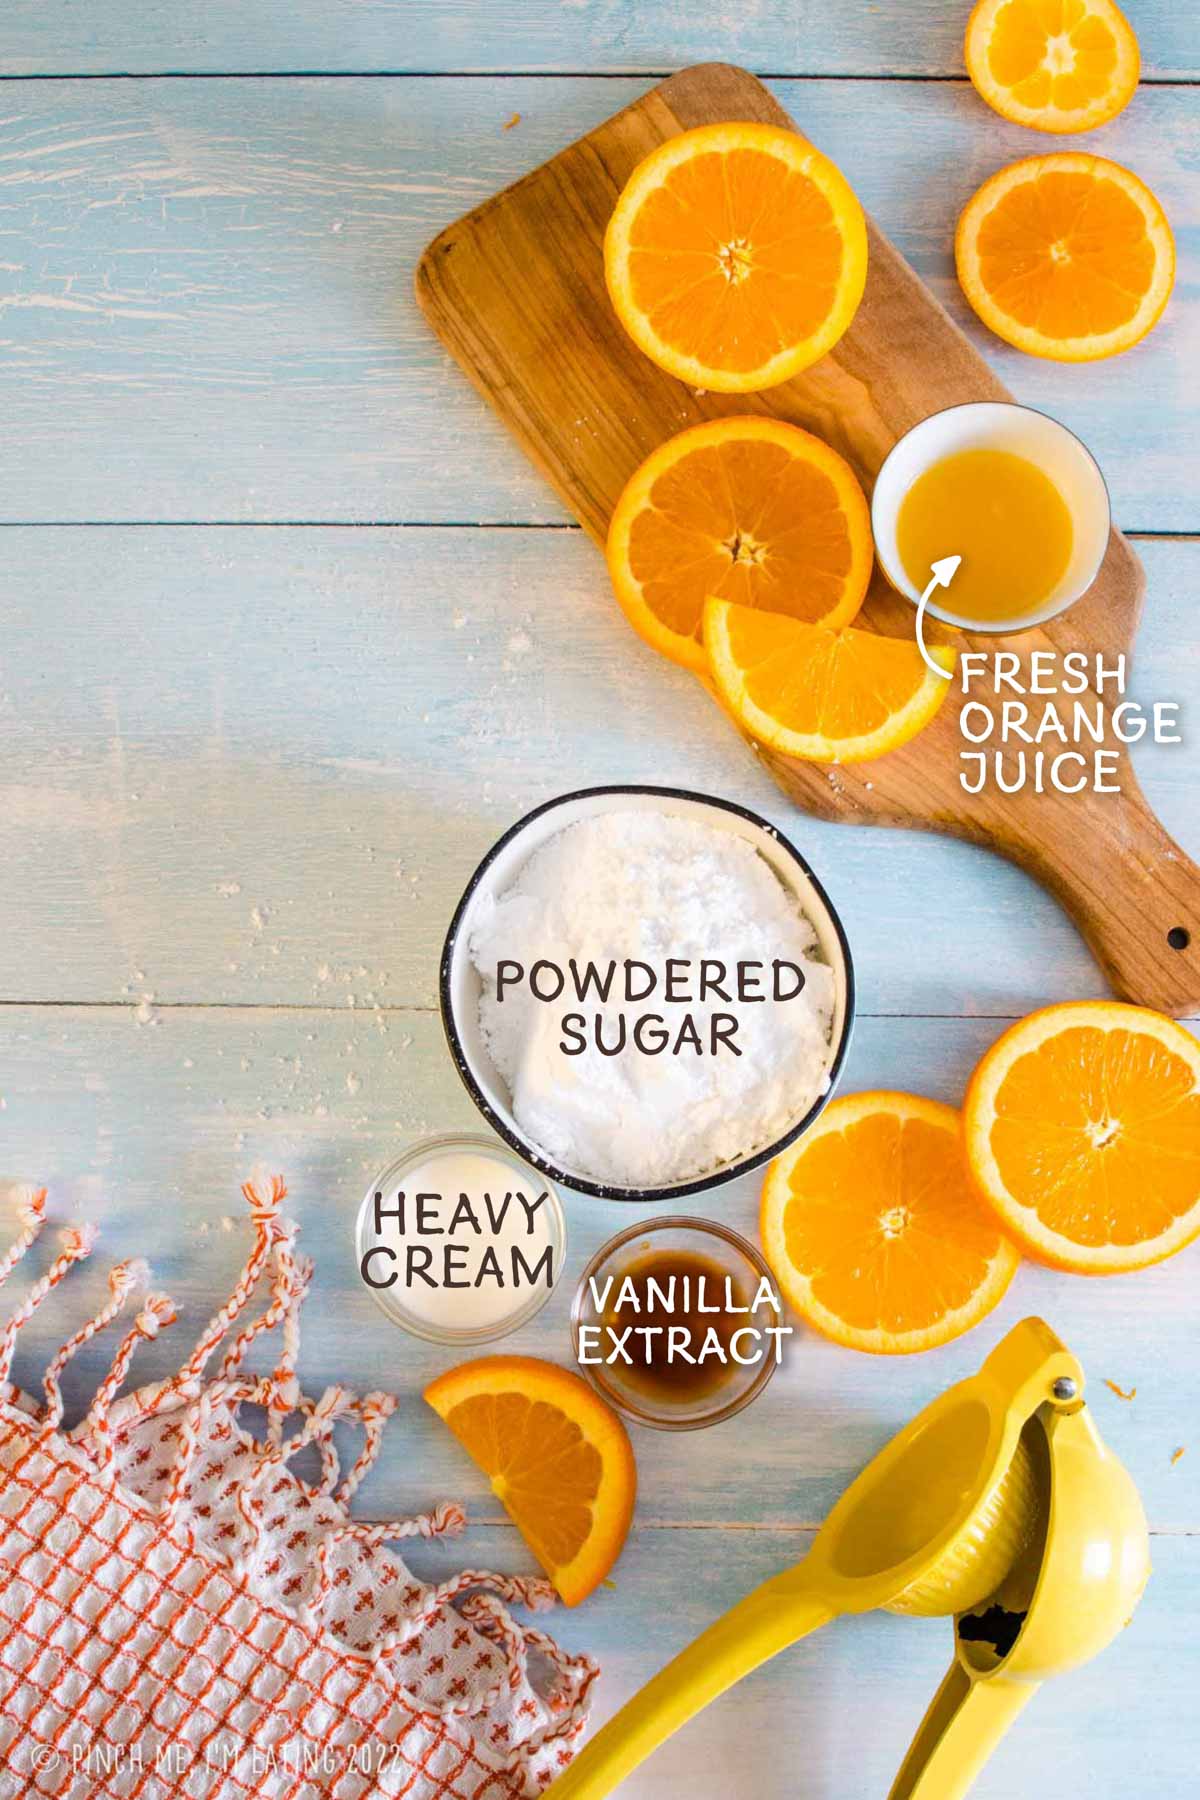
For the glaze
- 1 cup powdered sugar
- 1 tsp vanilla extract
- 2 tsp cream
- 2 tbsp juice from an orange
Instructions
- Preheat oven to 400 degrees and line a baking sheet with parchment paper.
- In the bowl of a food processor, mix flour, sugar, baking powder, salt, cardamom, and orange zest.
- Add cold butter cubes and pulse in the food processor until mixture has the texture of wet sand. If you don't have a food processor, you can use a pastry blender, a fork, or your fingertips to cut in the butter. Don't use the palms of your hands because that will transfer too much heat to the butter.
- Beat egg, cream, and vanilla extract in a separate bowl. Pour into food processor bowl and pulse with flour mixture until just combined.
- Pat mixture into a ball and shape into a 7 inch square. Cut into a 9-square grid, then cut each square diagonally to make 18 triangle-shaped mini scones. Arrange scones about an inch apart on prepared baking sheet.
- Brush the tops of the scones with cream and shake on coarse sanding sugar liberally.
- Bake for 12-17 minutes, or until you can see golden brown around the bottoms of the scones.
For the icing
- Mix the ingredients for the icing in a small bowl until smooth.
- After cooling the baked scones for a few minutes, flip the scones top-side down and dip the tops into the icing. Let excess icing drip off before putting right-side up on a wire rack. For easier cleanup, put wire rack on top of a baking sheet to catch drips.
- Let dry completely before storing. (If they are not completely cool and dry when you store them, the icing will be gooey instead of hard and shiny tomorrow!) Store in an airtight container at room temperature for up to three days or in the fridge for up to a week. See notes for freezing instructions.
- Enjoy on their own or with clotted cream, homemade lemon curd, or orange, cherry, or cranberry preserves!


I can’t believe I haven’t commented on this recipe yet. I’ve been making these scones for YEARS and they are fantastic. The only thing I do differently is cube the butter and pop it in the freezer while I prepare the rest of the ingredients because I don’t like grating slippery foods. They turn out perfectly every time! And.. I use this recipe as a base whenever I want to mix it up, like lemon blueberry scones with lemon zest instead of the orange… leave out cardamom.. fold in chunks of blueberries at the end. Yum! Thanks!!
Caroline, so refreshing to see a young homemaker that does not use a bunch of prepared ingredients. After 74 years, I am still cooking in the same farm/ranch house kitchen I learned in from my mother and grandmother. My daughters and granddaughter join in to help cook for the seasonal harvest and cow working crew. I followed your recipe for scones to a “tea” My teachers always pressed the issue, treat dough as if it were a china egg. Chill and grate your butter when it is used. That was the only thing I did differently . The scones were delicious.
Haha, followed it to a “tea”, love it! We just made these scones again last weekend when my dad came down to visit. Always a favorite recipe!
Just looking Vanilla bean powder. Looks pricey and wondering if it’s essential for this recipe.
You can leave it out! It adds a little extra vanilla flavor and those nice vanilla bean speckles but it’s not essential for the recipe.
Made these this morning because I needed some cheering up. Great texture. I didn’t have any cream, but whole milk worked just fine. I’ve already eaten six! LOL!
I’m so glad you liked these and hope they brought some cheer to your day too!
It was a wet and soggy day in Oregon yesterday. Wanted to try a cardamon orange combination sweet. Found your recipe and made a batch this morning. Oh my, they are tasty! Thanks for sharing.
I’m so glad you liked these! This flavor is my absolute favorite scone recipe. Perfect for soggy days, aren’t they?
These are to die for. Soft, fragrant, light and just the right amount of sweet. I’m a sucker for anything with cardamom, but these are definitely a new favorite. There’s a fresh batch sitting on my counter right now, and no one else is home, so it’s taking everything I’ve got not to finish the lot.
Thanks so much, Emily!! Cardamom is one of those under-appreciated spices that adds SO MUCH to a recipe. I need to make these again soon. I’m thrilled that you loved these!
I just saw that you were “marked safe” from hurricane Mathew. So glad to hear that! … The scones look amazing! I just had the worst maple glazed scone in the world when I was traveling with Patricia in Denver. Maybe I need to make a batch of these to make up for it… How could anything with orange and cardamom be bad?
We had a cappuccino scone or something at the Chocolate Iguana when we were in Tucson and it was terrible! I love that place but the scone was dry and SO SWEET. You definitely need a batch of these to redeem your bad scone experience. Thanks for your thoughts during the hurricane! We are headed back tomorrow. It doesn’t look bad at our house from the photos our neighbor sent. Hoping no trees fall that might be leaning now.